Skip to search Skip to navigation menu Skip to main content Selecting option will reload page

Category: Seasonal Crafts

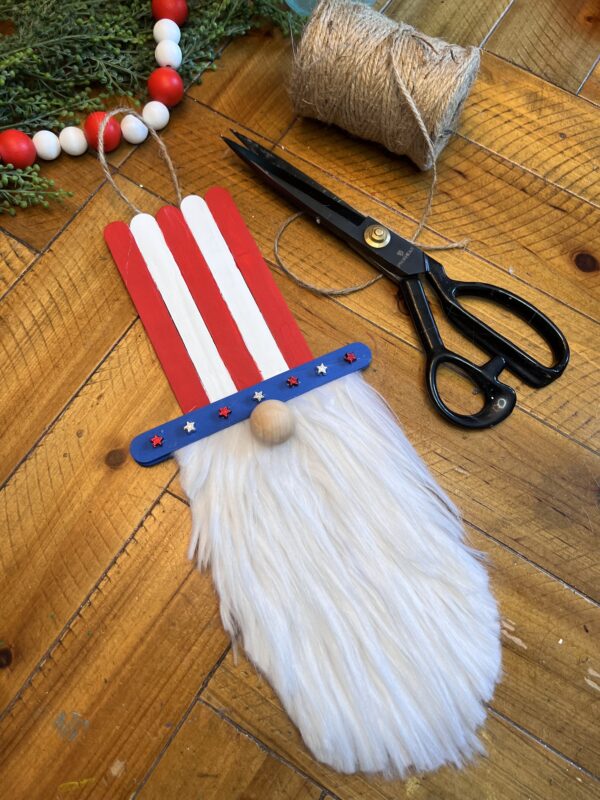
DIY ‘Uncle Sam’ Popsicle Stick Craft | 4th of July | Patriotic

Looking to add a touch of patriotic flair to your home decor? Why not try your hand at creating a DIY ‘Uncle Sam’ popsicle stick craft? This simple and fun project is perfect for all ages and adds a festive touch to any Independence Day celebration or Americana-themed decor. So grab your supplies and let’s get crafting!
Difficulty level: Beginner
Time to complete: 25 minutes
Age range: 7 and up

Things you’ll need:
1 package ofJumbo Unfinished Wood Craft Sticks
Acrylic paint (Primary Blue,Bright Red,andwhite)
1″ Unfinished Wood Balls
Metalic Star Beads
Long Pile White Craft Faux Fur
Q-tips
Vaseline
Scissors
Paint Brushes

Link to materials used:
https://factorydirectcraft.pro/catalog/advanced_search_result.php?keywords=FBnclsmppsclcrfttwt

Let’s grab your supplies, channel your inner artist, and let’s get crafting!
Step 1:

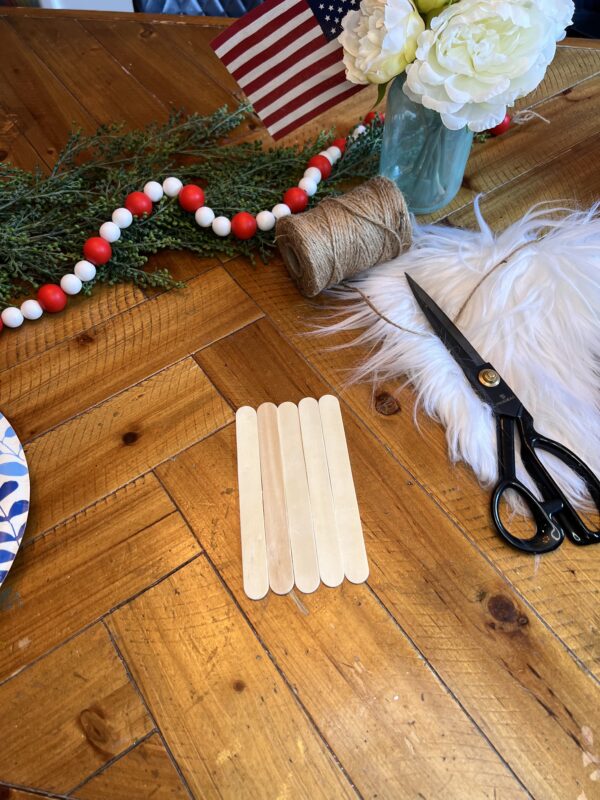
Here you will grab your popsicle sticks and line up 5 in a row.
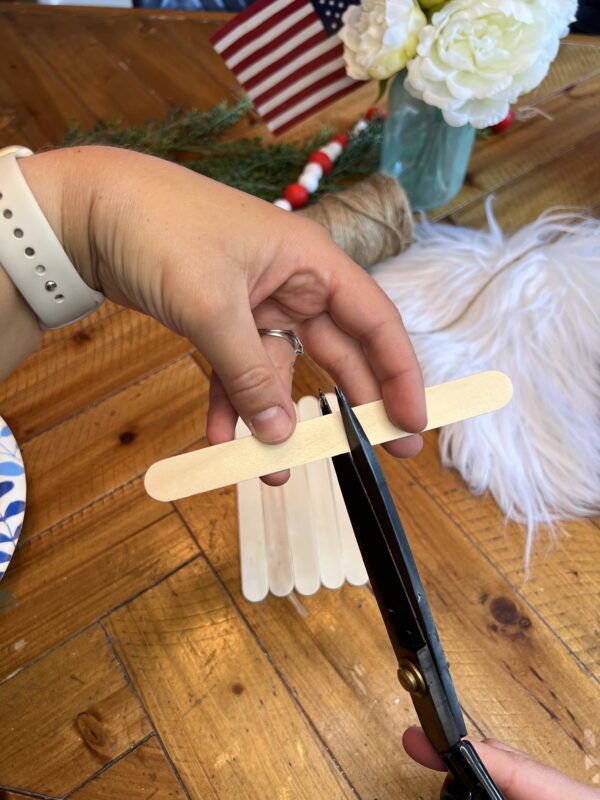
Cut one popsicle stick approximately in half. Ensure each half is long enough to glue across the row of popsicle sticks. You’ll need one half for the top and one for the bottom to hold them in place.
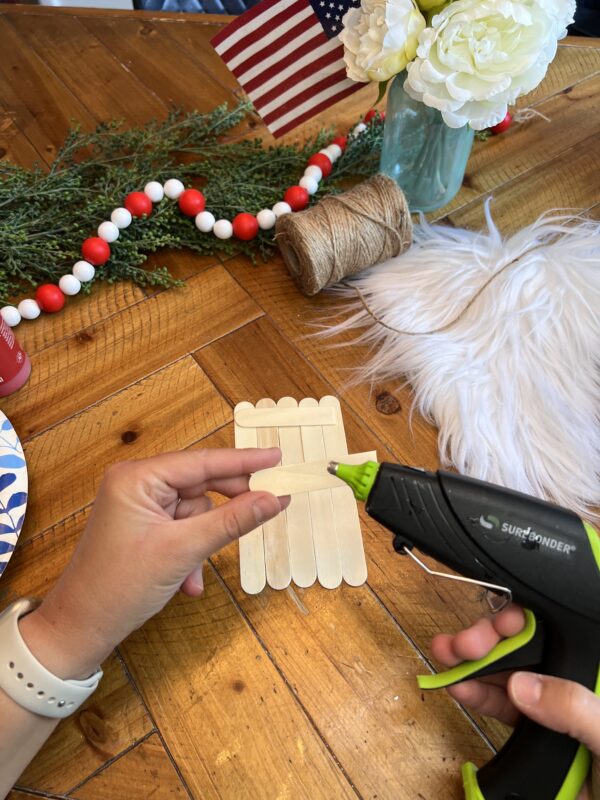
Step 2:

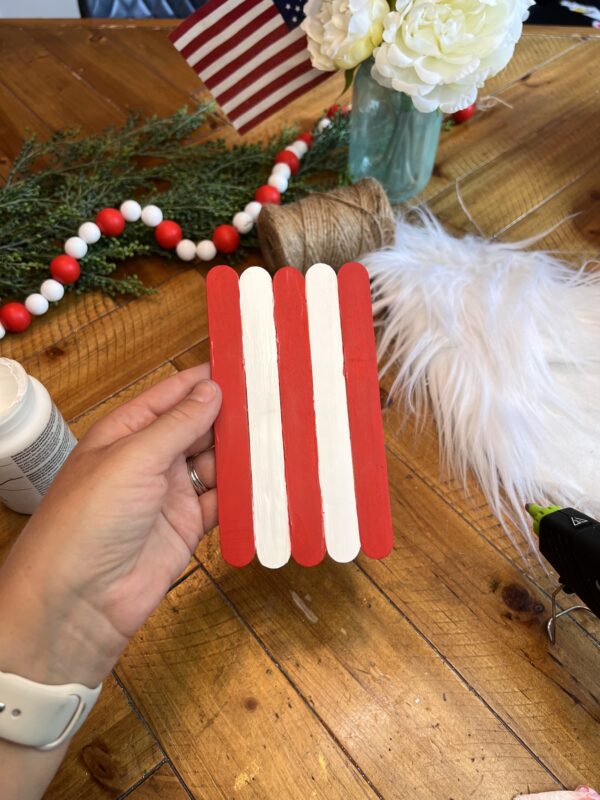
Grab your red, white, and blue paints. Alternate painting the connected popsicle sticks red and white, so you have three red and two white sticks. The will be the top of the ‘Hat’.

If you prefer, paint the sticks before connecting them. This way, you don’t need to be too precise.
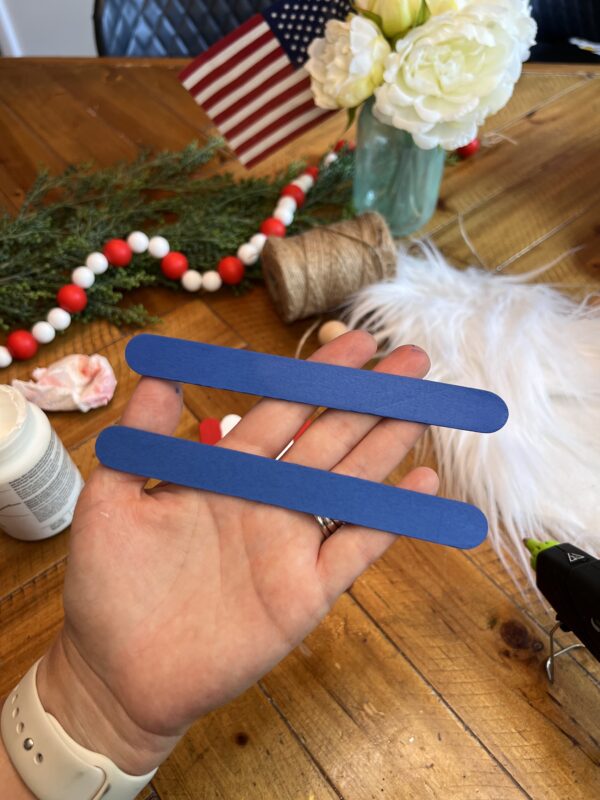
Then you will grab 2 other sticks. You will want to paint these the blue color. This will end up being the ‘brim’ of the hat.
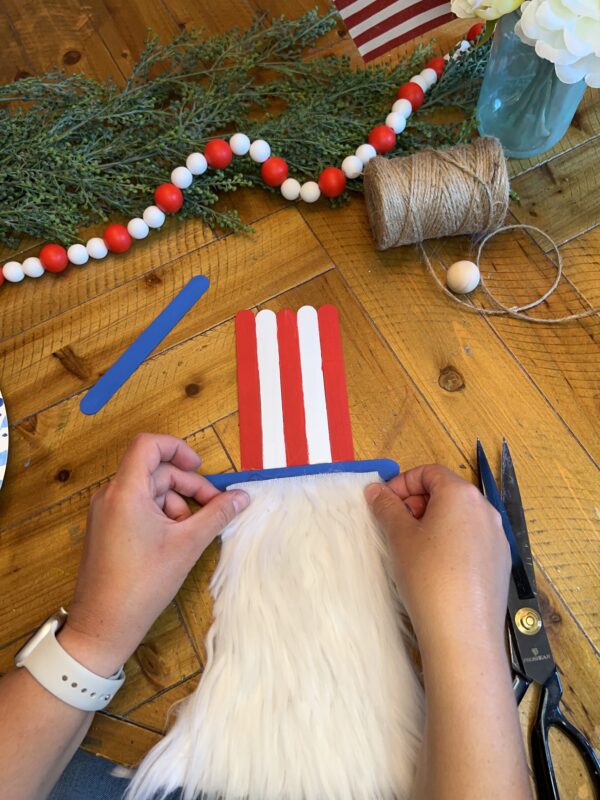
Step 3:

Take one blue popsicle stick and hot glue that in place at the bottom of the ‘Hat’. Once that is in place, you will grab your white fur and cut out a section that is a little smaller than the width of the blue stick.
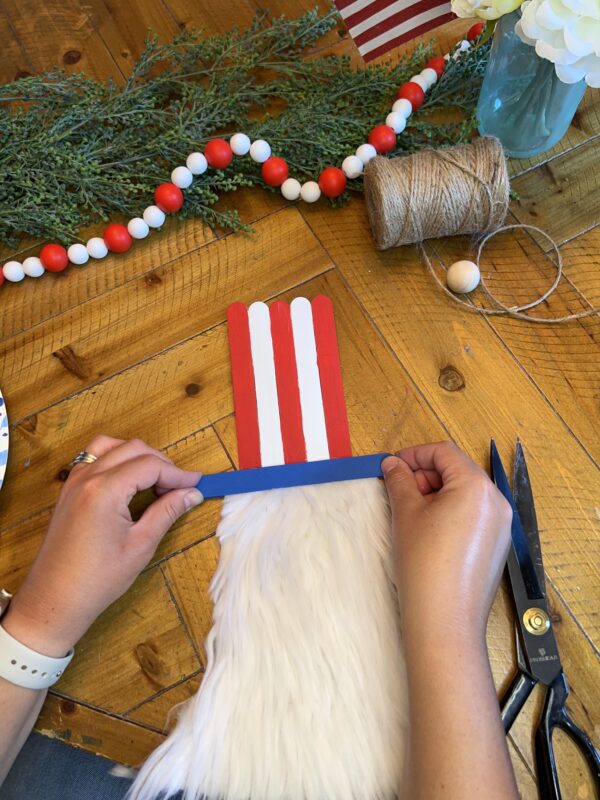
Take your 2nd blue popsicle stick and glue the on top to cover the fur to make the ‘beard’.

Once this is secure, take your scissors and cut the beard into a rounded shape towards the bottom or any other shape you wish!
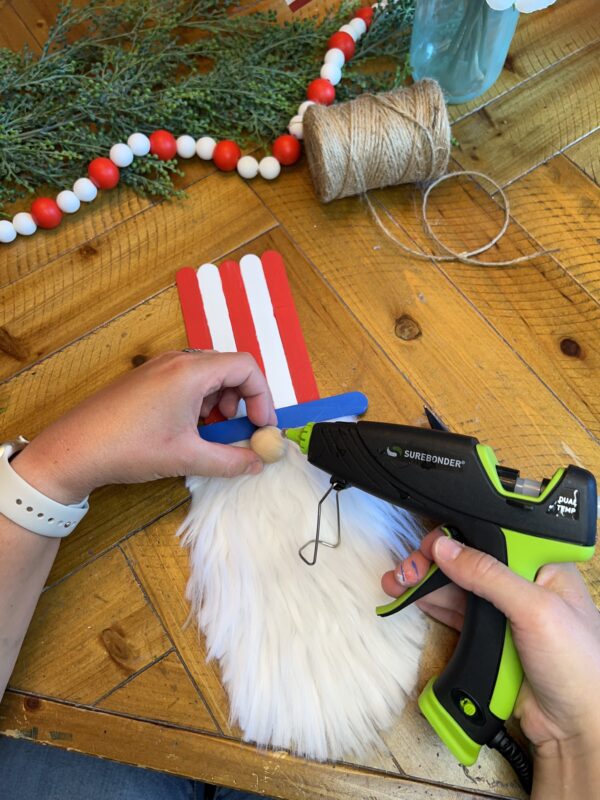
Step 4:

Grab your 1 inch round wood ball and glue that into the center and below the hats ‘brim’ onto the fur.
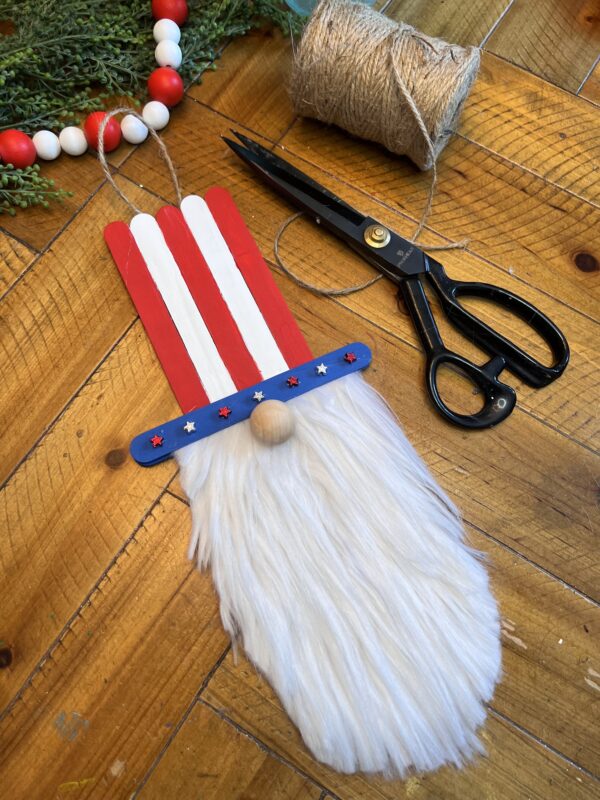
Last step, you can create this into a hanger if you wish. Grab some twine and cut a 6 each piece. Glue this into a loop on the back side, then all done!! Hang it and enjoy. Place it into a wreath or any other areas. Just a fun project for any ages.
Continue Reading

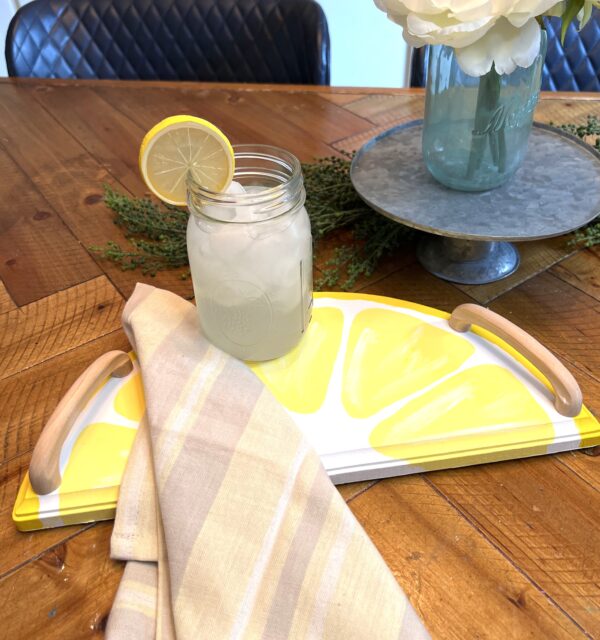
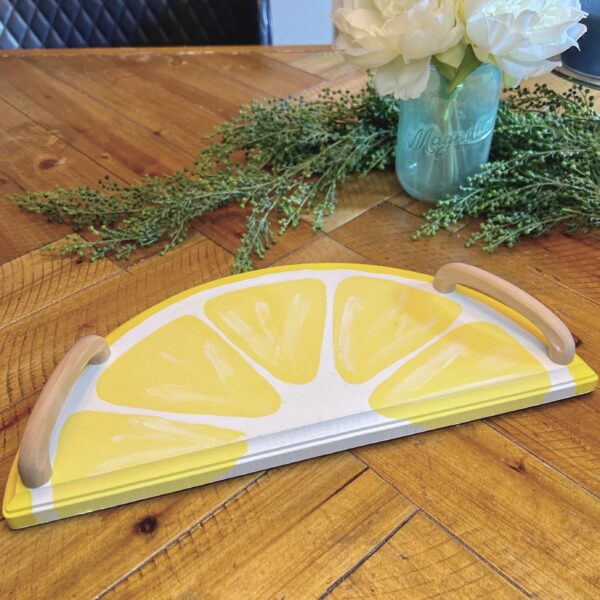
DIY – Crafting Handmade Wooden Lemon Serving Tray

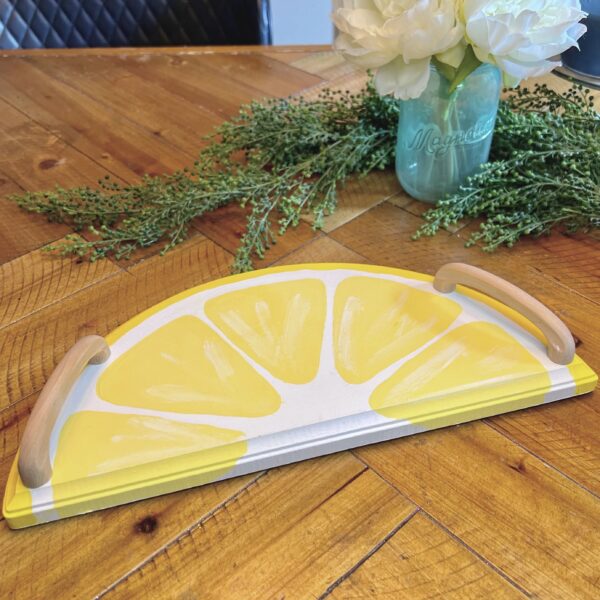
This was by far my favorite project! You can use this for serving, display in the home for decor purposes or use for parties! Lemons have always been a summer go to decor option! Now I want to craft a watermelon, orange and lime!!

Difficulty level: Beginner
Time to complete: 60 minutes
Age range: 8 and up

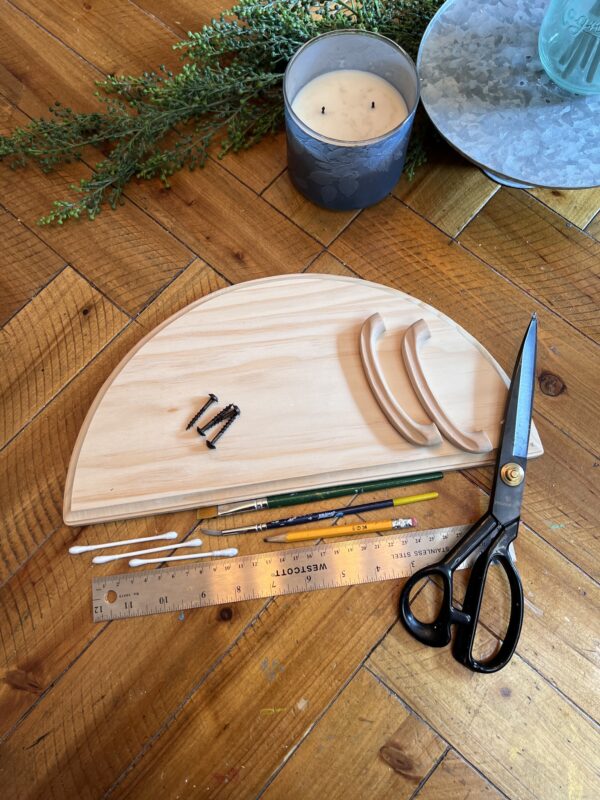
Things you’ll need:
1 of Unfinished Half Circle Wooden Plaque
Acrylic paint (Lemon Yellow,Canary,and white)
Unfinished Wood Cabinet Door Handles
Scrap Cardboard
Q-tips
Scissors
Paint Brushes
Drill
4 screws
Pencil
Eraser

Link to materials used:

https://factorydirectcraft.pro/catalog/advanced_search_result.php?keywords=FBlmnsrvngtrycrft

Let’s grab your supplies, channel your inner artist, and let’s get crafting!

Step 1:

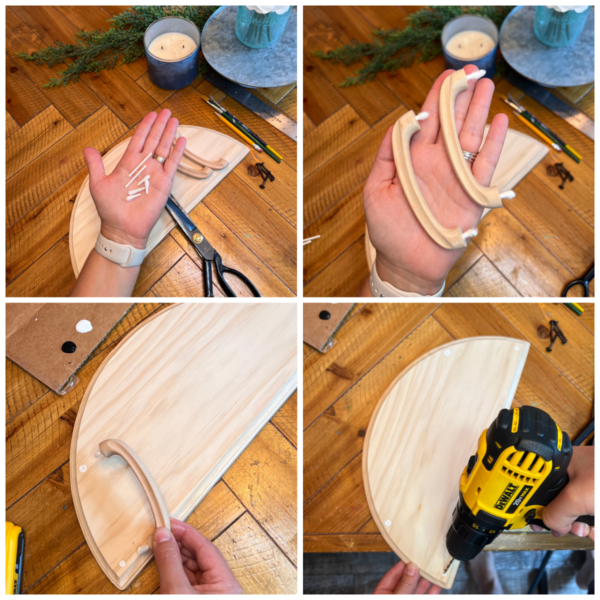
To start, we need to determine where you’d like to drill the handles onto the plaque. Since this is intended to be a serving tray, I’ll place them on the sides.

Instead of measuring, I wanted to find a quick and easy way to mark the holes. I cut the ends off some Q-tips, placed them into the handle holes, dipped the Q-tips in paint, and then used them to mark the drilling spots. This method worked PERFECTLY! icon

Drill your holes and paint the whole thing white!

Step 2:

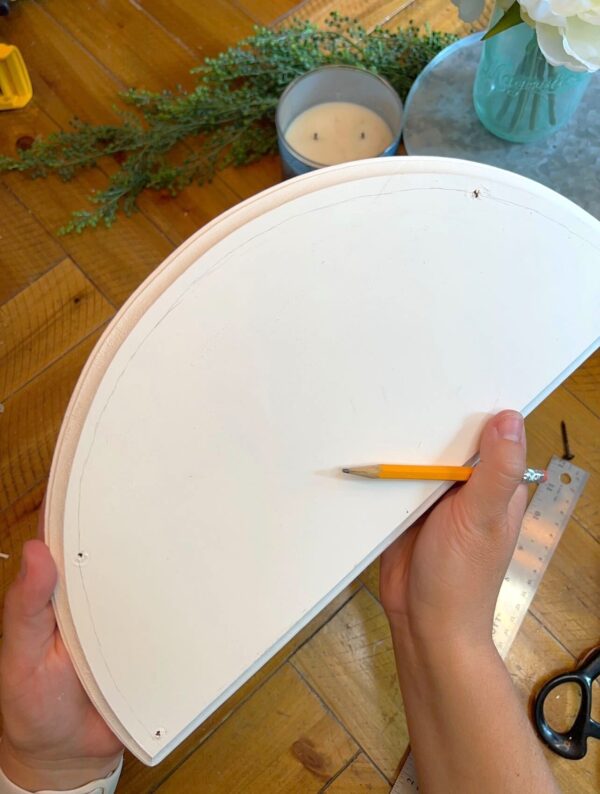
Once the paint has dried, use a pencil to outline the “rind,” which is the outer layer of the lemon. Begin at the middle of the drilled holes, starting from the bottom left-hand side, and draw a curved line all the way around to the other side.

Step 3:

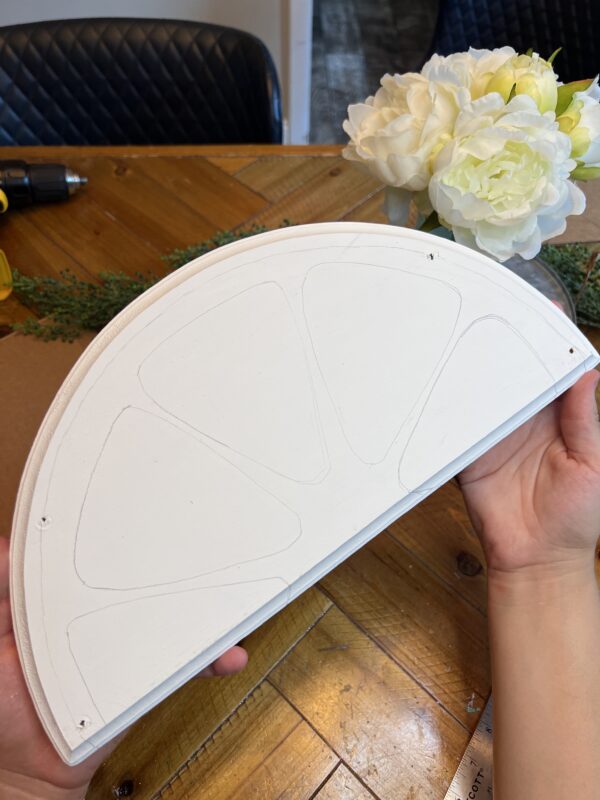
Take a scrap piece of cardboard and cut out a rounded pizza slice shape. This will serve as your stencil for tracing the lemon slices.

Draw lightly, as you’ll need to come back and slightly erase the pencil markings later to ensure they don’t show through the yellow paint.

Step 5:

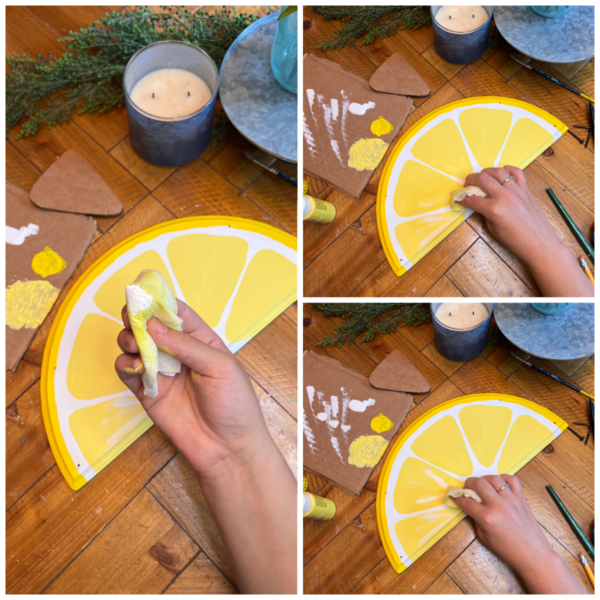
You will then take your lemon paint from Apple Barrel Paint and this will be the ‘rind’ color- The curved line you drew around the plaque.

Come in with your lighter color yellow. In this case, i used canary by Apple Barrel Paint. This will be the color of your lemon slices inside.

Step 6:

Once the paint is completely dry, take a piece of napkin or paper towel, crumple it slightly, and dip it into a mixture of light yellow and white paint (using more white than yellow). Dab off the excess paint, then gently dab the ‘gloss’ lines onto the lemon slices. This will add contrast and make the lemon slices stand out.

I left the handles the unfinished look. I felt if i painted them any other color, it would take away from the tray itself.

I am in awe of how this turned out! This is definitely one of my favorite projects!

Continue Reading
Change Your Country
Please select your country, this will change the site to your country's currency:

Cancel