If you love decorating with a vintage farmhouse style, these DIY Rustic Jack O’Lanterns are the perfect weekend craft. They’re simple to make, budget-friendly, and look like something you’d find in a charming boutique. Proves that Halloween decor can be both spooky and cozy. Their distressed finish, whimsical smiles, and farmhouse-inspired details make them a timeless addition you’ll enjoy bringing out year after year.
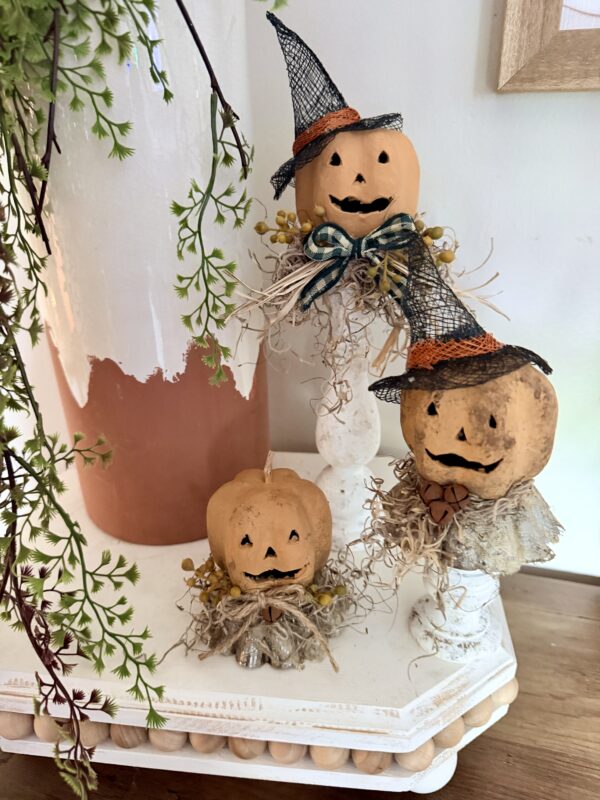
Whether you display them on a mantel, bookshelf, entryway table, or tiered tray, these whimsical pumpkins are guaranteed to bring smiles all season long.
Let’s grab your supplies, channel your inner artist, and let’s get crafting!
Materials Needed:
- 6-3/4″ Unfinished Wood Candle Stick
- Unfinished Candle Sticks
- Wood Bean Pot Candle Cups
- Paper Mache Jack O’ Lantern Pumpkins
- 4″ Vintage-Inspired White Lace Ribbon
- Artificial Dusty Sand Brown Berry Bush
- Natural Dried Raffia Ribbon
- 9 mm Rusty Jingle Bells
- 3″ Seamless Metal Fluted Tart Candle Mold
- Natural Jute Twine
- Miniature Black Sinamay Witch Hat
- 1″ Green Gingham Check Wired Ribbon
- Mod Podge
- Mango Apple Barrel Acrylic Paint
- Brown Oxide Apple Barrel Acrylic Paint
- Khaki Apple Barrel Acrylic Paint
- White Apple Barrel Acrylic Paint
- Paint brushes
- Paper Towels
- Hot Glue and Glue Gun
- Scissors
Materials Used in This Project
🛒 Shop the materials:
https://factorydirectcraft.pro/catalog/advanced_search_result.php?keywords=FBjcklntrncndlstnddsplychrm
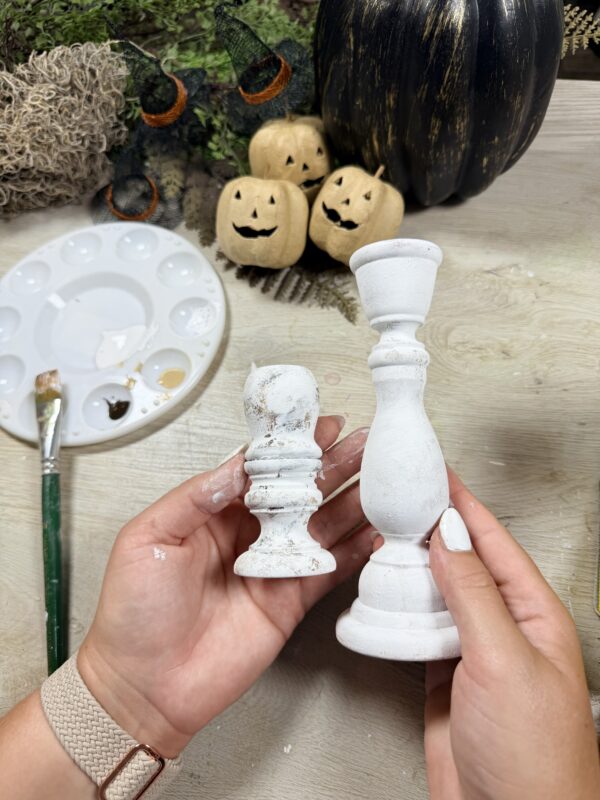
Step One: Prep the Candle Sticks
For this project, I created a 3-tier display, but you can easily make more or fewer depending on the look you’re going for.
For the first tier, I glued together:
- 1 Unfinished Wood Candle Stick
- 1 Wood Bean Pot Candle Cup
For the second tier, I used:
- 1 6-3/4″ Unfinished Wood Candle Stick
To give the candle sticks a rustic, aged finish, I started by painting them with a coat of white acrylic paint as the base. Once dry, I lightly dabbed Antique White and brown paint over the surface using a crumpled paper towel. This creates beautiful texture and variation without harsh brush strokes.
After that layer dried, I went back over the candle sticks with a little more white paint, dabbing it on lightly to soften the brown tones and blend everything together. The result is a weathered, farmhouse-inspired finish that’s perfect for fall and Halloween decorating.
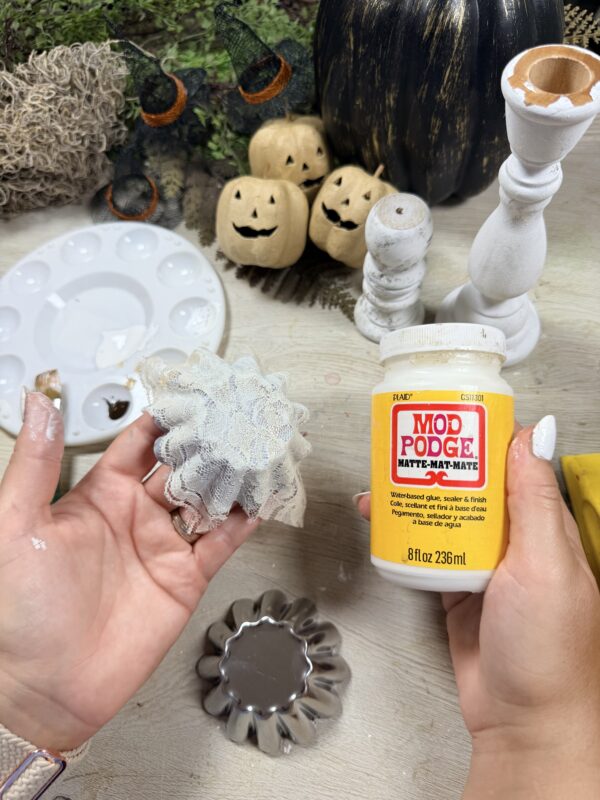
Step 2: Prepare the Candle Mold Tins
Next, it’s time to prepare the candle mold tins. For this project, I used two molds.
Start by turning each mold upside down and applying a light, even coat of hairspray. Allow it to dry completely. Once dry, brush on a thin layer of Mod Podge over the surface.
Cut a piece of lace ribbon to fit the mold and carefully lay it in place, smoothing it out as you go. Then, apply another thin coat of Mod Podge over the top of the lace, making sure it’s fully saturated and adhered to the mold.
Set the molds aside and allow them to dry completely before moving on to the next step. This process creates a beautiful textured finish that adds vintage farmhouse charm to your finished project.
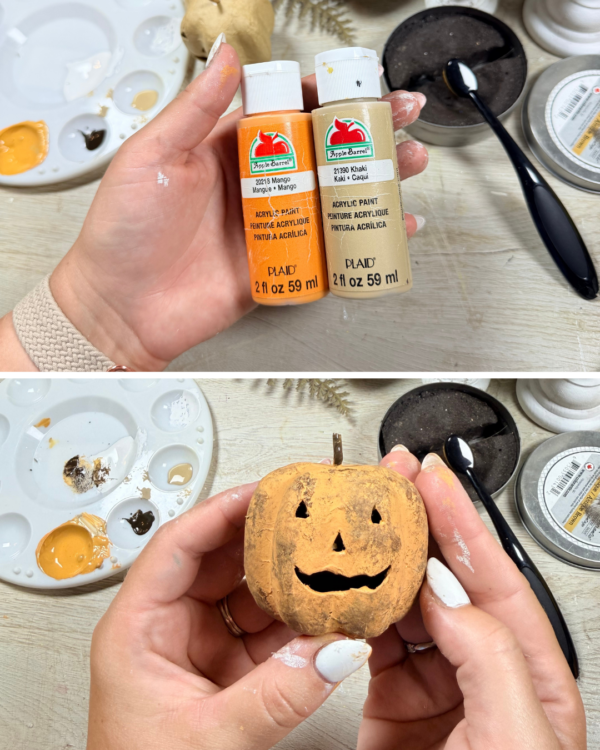
Step 3: Prep the Paper Mache Jack O’Lanterns
To give my Jack O’Lanterns a warm, rustic look, I mixed Mango Orange and Khaki Tan acrylic paints to create a softer, muted pumpkin color. Once I was happy with the shade, I painted all three paper mache Jack O’Lanterns and allowed them to dry completely.
After the base coat dried, I used acrumpled paper towelto lightly dab onbrown paint, adding depth and an aged appearance. Then, I went back over the pumpkins with my custom orange paint mixture, gently dabbing it over the brown to soften the contrast and blend everything together.
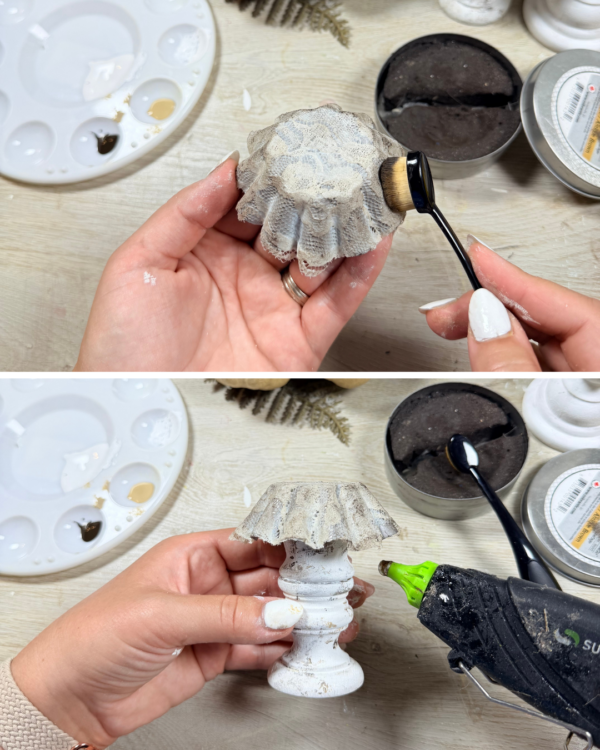
Step 4: Age the Lace
Once the lace had fully adhered to the candle mold tins and the Mod Podge was completely dry, it was time to give it a vintage, timeworn look.
Using Antique Wax, I lightly brushed over the lace, working it into all the textured details. Then, I gently wiped away any excess with a paper towel, leaving just enough behind to highlight the pattern and create a beautifully aged, grungy finish.
Find them here:
https://amzn.to/4mzuNkv – blender
https://amzn.to/4mfkbsq – wax
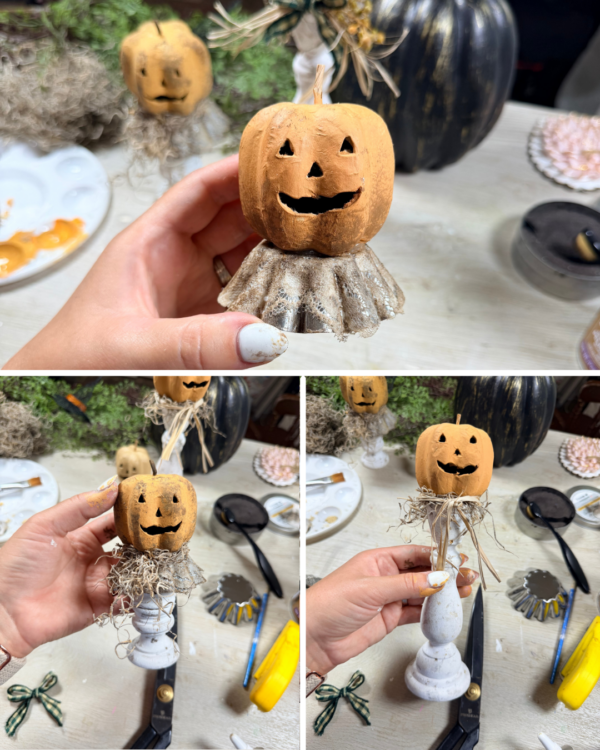
Step 5: Assemble the Jack O’Lanterns
Now for the fun part-bringing your Jack O’Lanterns to life! Glue each pumpkin onto its prepared base, then add your favorite embellishments. I used a mix of aged lace, Spanish moss, raffia, faux berry sprigs, jute twine, rusty bells, and decorative ribbon to give each one its own unique personality.
Mix and match the textures and accents to create a one-of-a-kind pumpkin family. The different heights and details make for a charming rustic Halloween display! 🎃
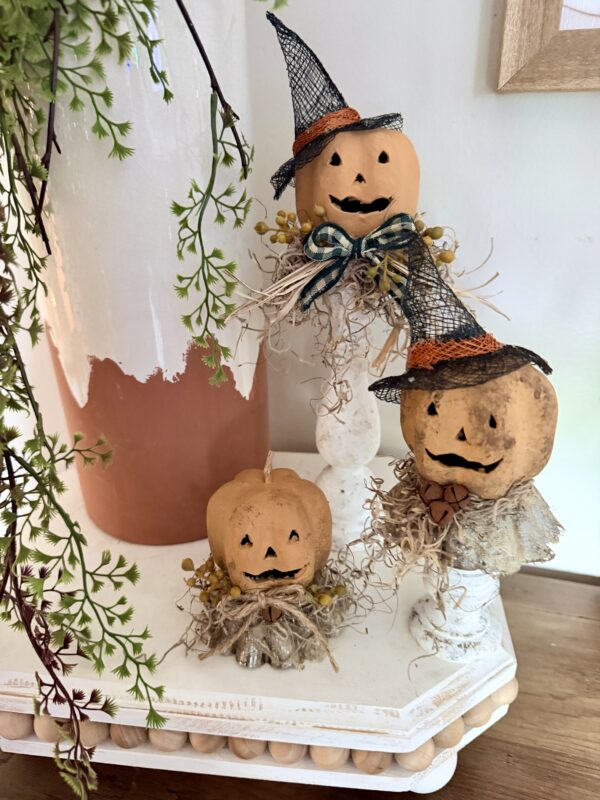
I hope this DIY inspires you to create your own charming Jack O’Lantern family! One of my favorite things about this project is that there are no rules-each pumpkin can have its own personality with different textures, embellishments, and finishes. That’s what makes handmade decor so special.
Whether you display them on your mantel, a tiered tray, an entryway table, or tucked into your favorite fall vignette, these little pumpkins are sure to add cozy farmhouse charm to your Halloween decorating.