Skip to search Skip to navigation menu Skip to main content Selecting option will reload page

Category: Kid's Arts and Crafts

EASY DIY Witch Peg Doll Craft for Halloween

Are you looking for a fun and creative project that adds a touch of magic to your decor? Crafting a DIY wood witch peg doll is the perfect way to get into the spooky spirit of Halloween, or to simply enjoy a whimsical craft that’s easy and enjoyable for all ages.
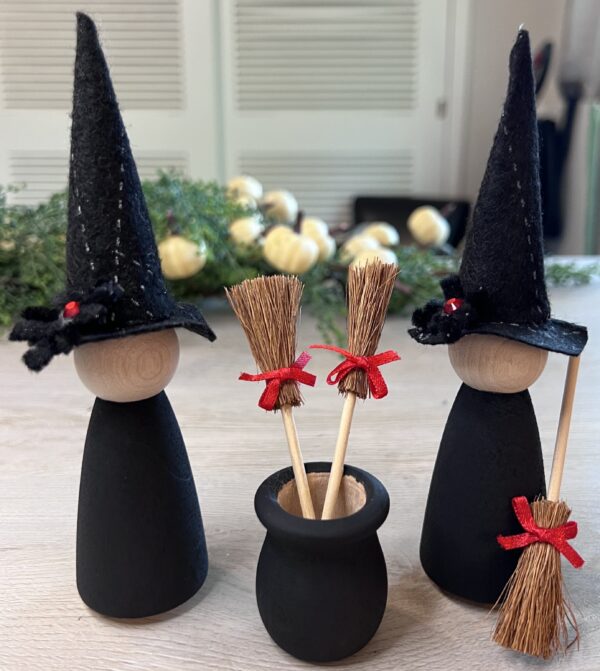
Difficulty level: Beginner
Time required: 45 minutes
Age range: 8+

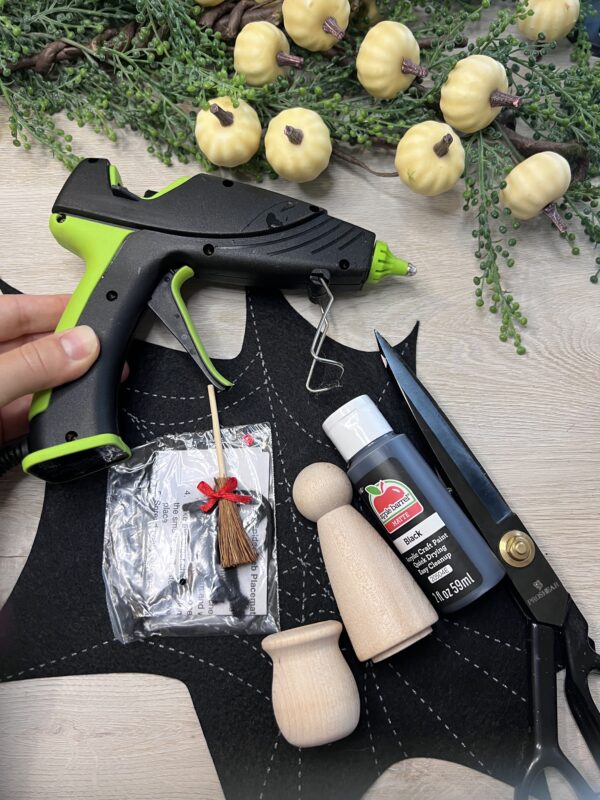
Materials Needed:
Unfinished Wood Peg Doll Bodies
Unfinished Wood Bean Pot Candle Cups
Dollhouse Miniature Broom with Ribbon
Black Spider Web Placemat Kits
Black Apple Barrel Acrylic Paint
Scissors
Hot Glue Gun and Sticks
Paint Brushes

Material list found here:
https://factorydirectcraft.pro/catalog/advanced_search_result.php?keywords=fbspdrwbwtchpegdll
Let’s grab your supplies, channel your inner artist, and let’s get crafting!
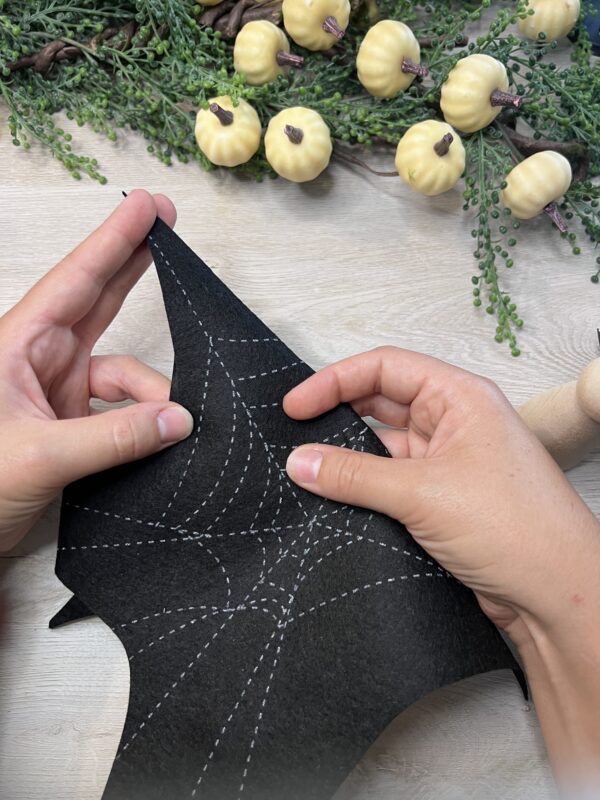
Step 1 – Preparing the Hat

This step you will want to grab one of theBlack Spider Web Placemat. You will cut on of the longer triangle ends off the mat. This will be the top portion of the witch hat.
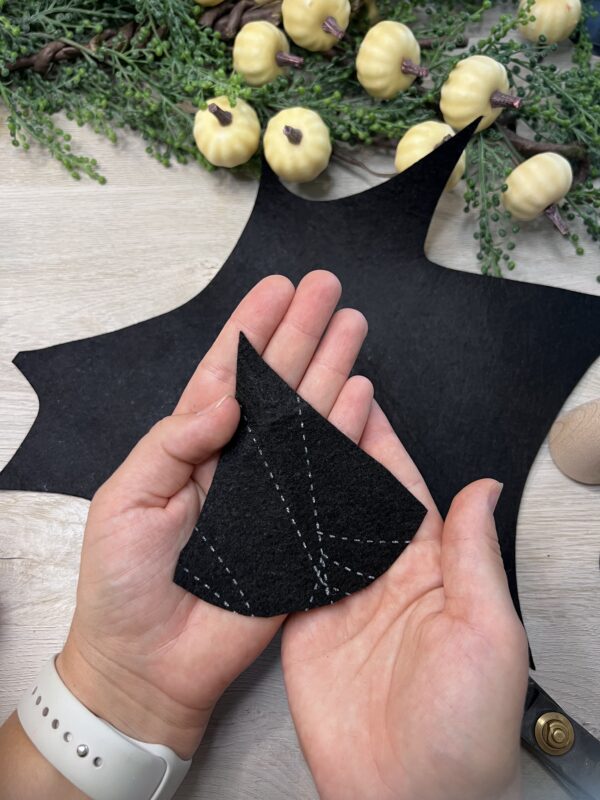
Form the Cone:

Roll the felt into a cone shape, with the straight edges overlapping slightly to create a pointy tip. Adjust the size of the base by trimming if necessary.

Notes:

  • When cutting it off, do not make a straight line across, you will want to have it rounded slightly.
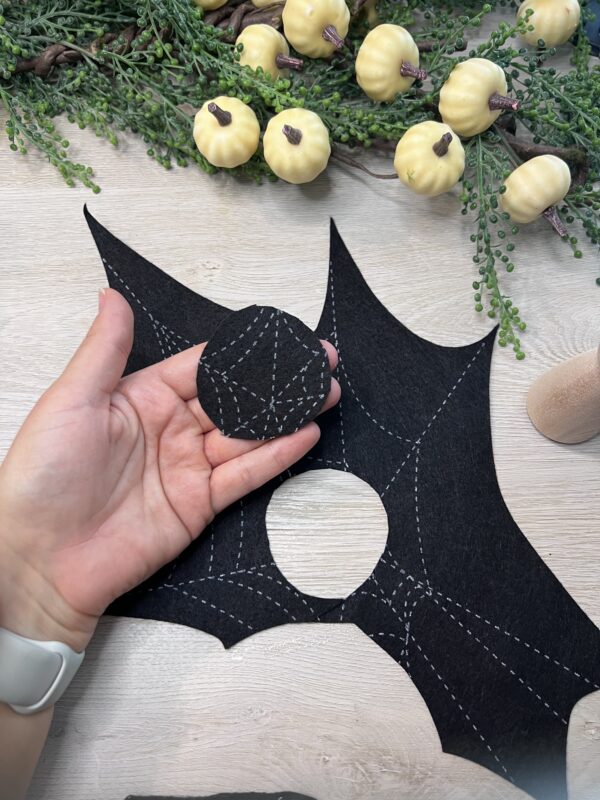
Step 2: Cutting the bottom brim

Using the same Black Spider Web Placematyou will figure out the size of the brim you wish for your hat. Place your cone flat onto the mat. Trace out the circle size you wish. Then cut out.
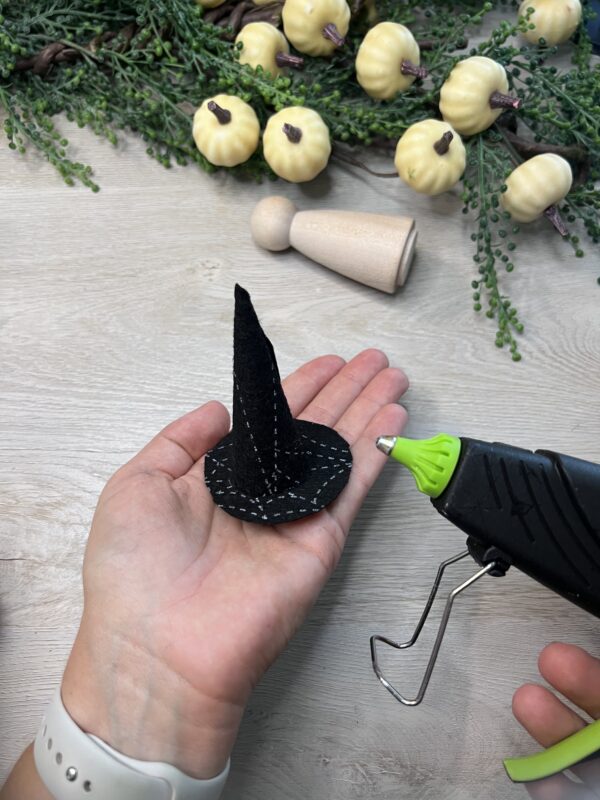
Step 3 – Assemble the Hat

Here you will grab your hot glue gun and glue your cone to the brim of the hat. Trim around to shorten the width if needed.

  • If you wish, you can cut a hole in the center of the brim to help fit on the wooden dolls head.
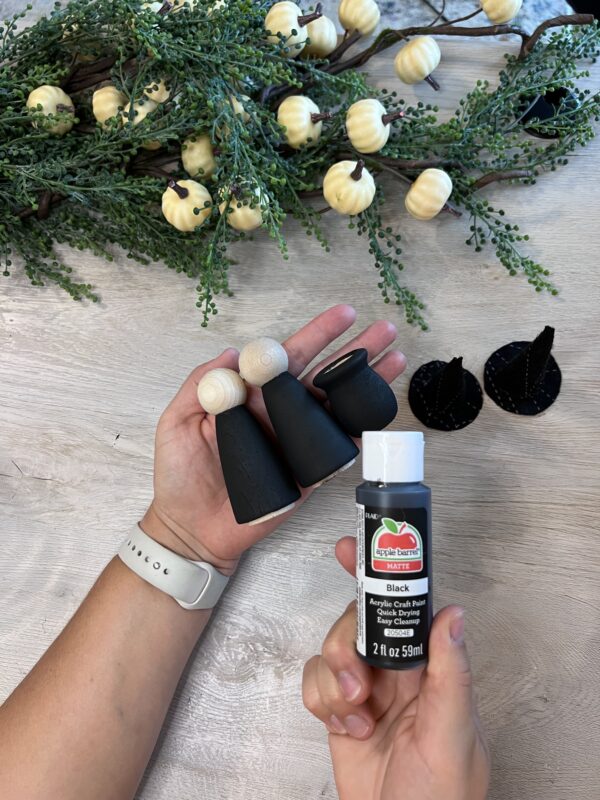
Step 4 – Adding the paint

I kept this pretty simple with the paint. I painted the body of the Wood Peg Doll Bodies all black and then painted the Wood Bean Pot Candle Cups
Step 5 : Add Finishing Touches

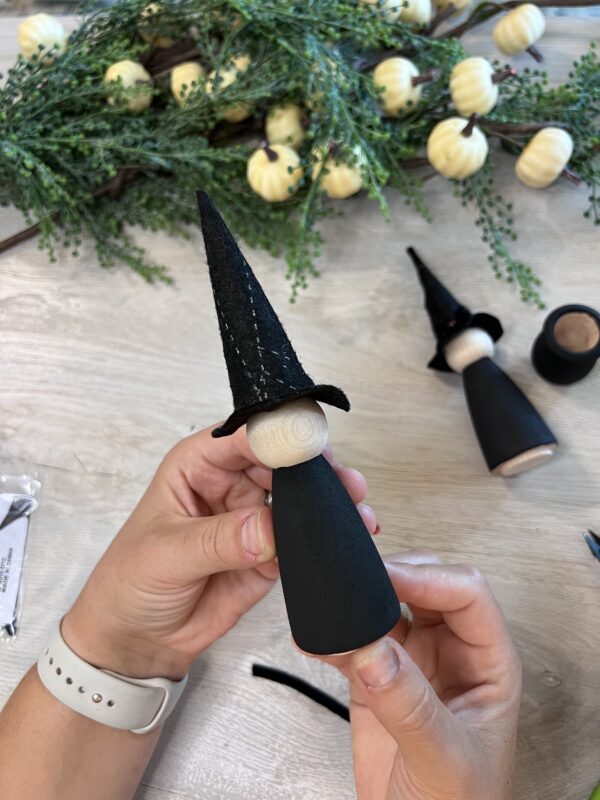
Once the paint is dry, let’s add the witch hat. You will simply just hot glue them onto the head.
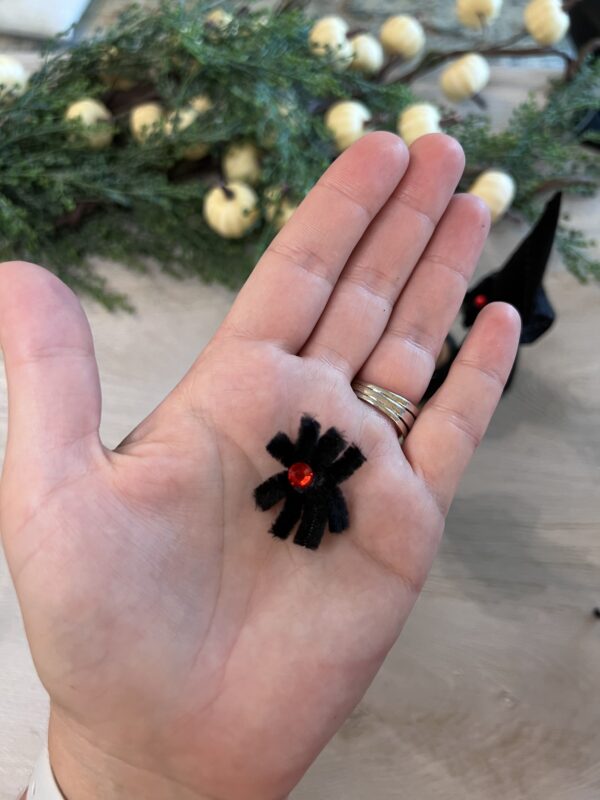
TheBlack Spider Web Placemat Kitscomes with accessories to make a spider that hangs off the place mat. However, since the provided spider would be too large, I decided to twist the pipe cleaners together to make a smaller version. After trimming them to size, I hot glued a gem in the center to complete the spider.
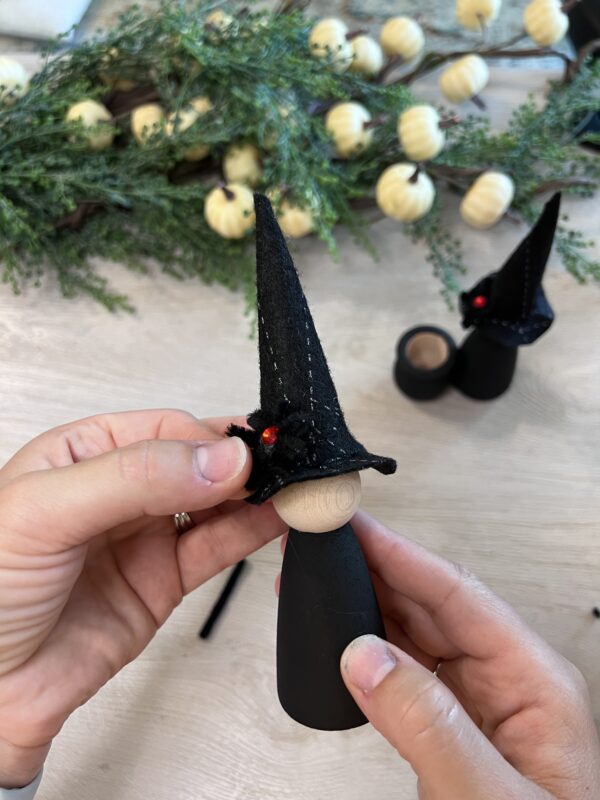
Lastly, glue that tiny spider into place on the hat where you desire. Then it is ready to display!!

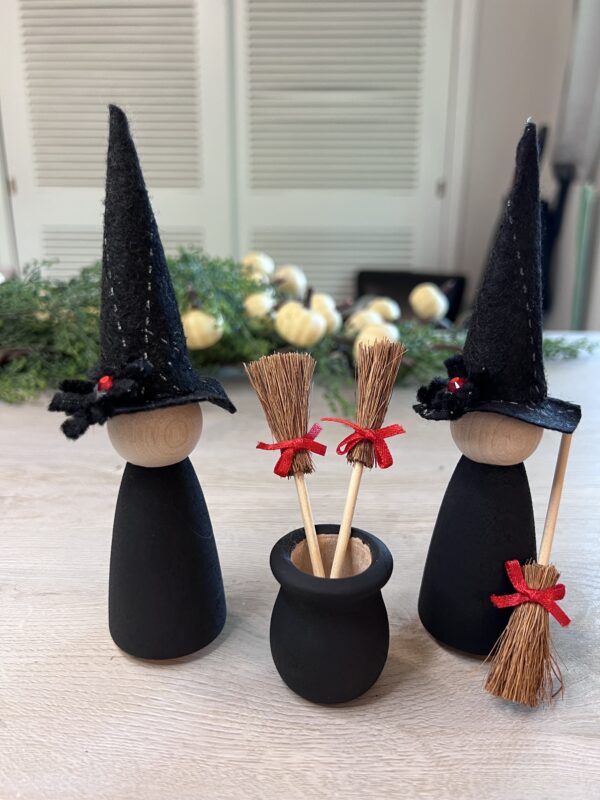
This DIY wood witch peg doll is not only easy to make, but it’s also a great way to express your creativity. It’s a fun project for kids and adults alike, and the results are always charming. Plus, you can customize your witch to suit any style or theme, making it a versatile craft that you can revisit each season.

Happy crafting!
Continue Reading

DIY Halloween Crystal Ball Craft | Fall | Decor | Project

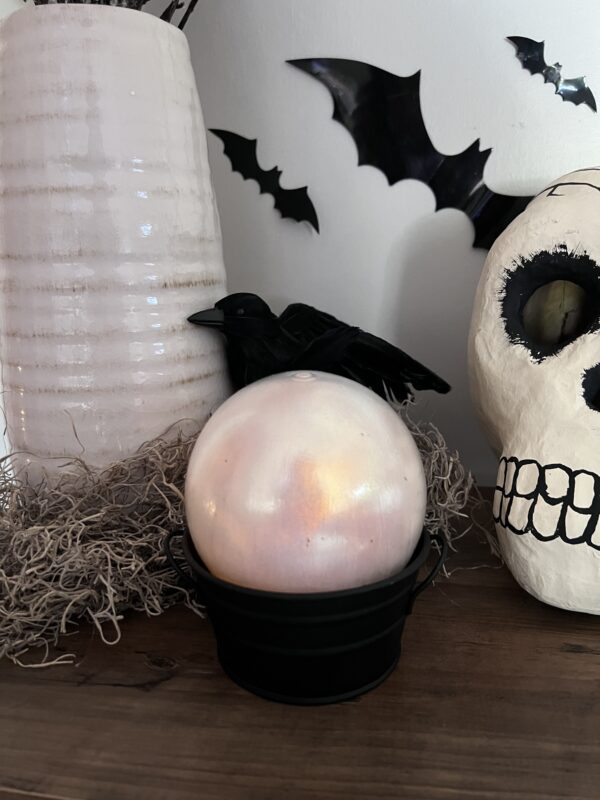
Creating a DIY Halloween crystal ball using a snow globe jar is a fun and creative project that adds a spooky, mystical touch to your Halloween decorations. Whether you’re hosting a party or just want to get into the Halloween spirit, this project is both simple and customizable. Here’s a step-by-step guide to making your very own crystal ball.

https://youtube.com/shorts/pA_fP0bjChY

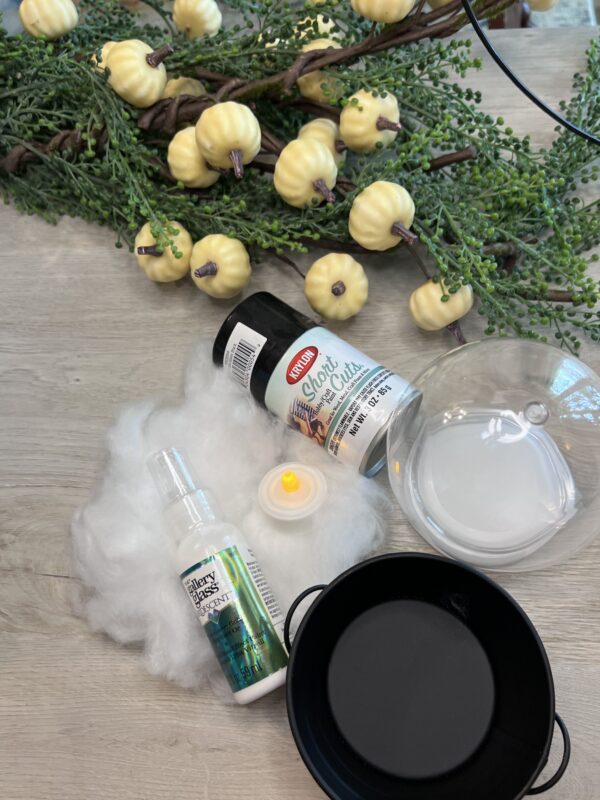
Needed supplies:

4″ Clear Acrylic Snow Globe Jar
LED Battery Operated Flickering Tea Light Candle
Primitive Black Tin Round Tub
2 Fluid Oz. Iridescent Blue, Green and Gold Iridescent Gallery Glass Window
Krylon Short Cut Black Gloss Enamel Spray Paint
Paint brushes
Glue dots
Fake snow – https://amzn.to/4deRTsN

Shop the needed material here:
https://factorydirectcraft.pro/catalog/advanced_search_result.php?keywords=+FBcrystlbllcrfthllwn

Let’s grab your supplies, channel your inner artist, and let’s get crafting!

Step 1 – Prepare the Snow Globe Jar:

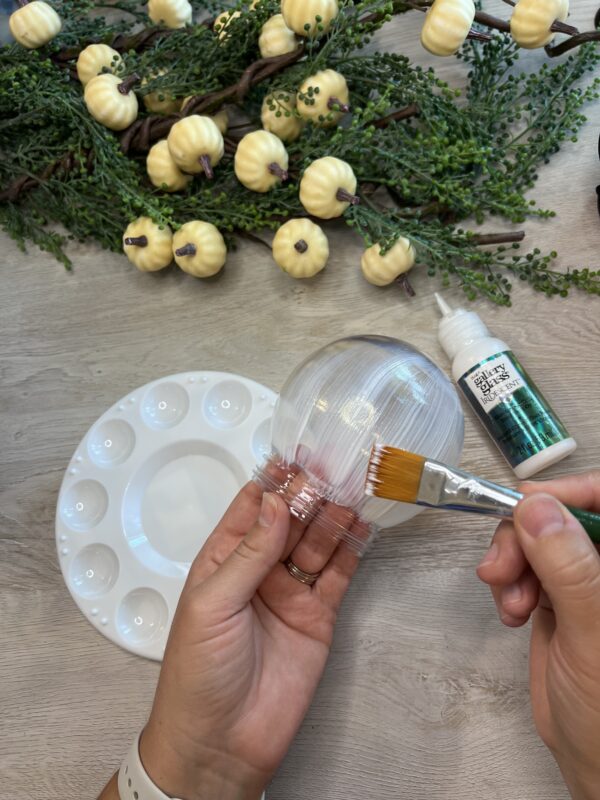
Start by disassembling your snow globe jar. Begin by applying a generous coat of Iridescent Blue, Green and Gold Iridescent Gallery Glass Window paintto the clear ball portion of the snow globe. You’ll want to build up the color, so I recommend applying about three coats.

Step 2 – Blend the bottom portion

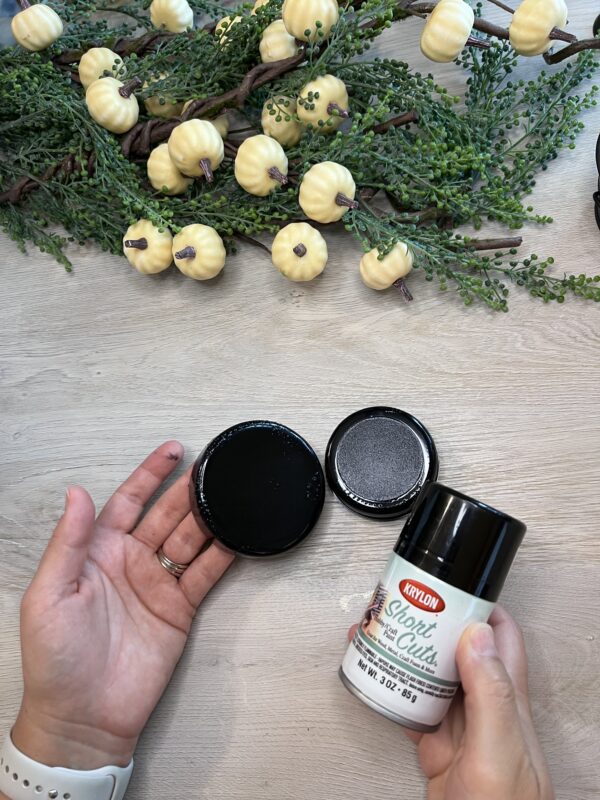
Grab your Black Gloss Enamel Spray Paint cover the bottom portion of the snow globe. This will include the tight insert and the screw on lid.

Step 3 – Create the Scene Inside the Globe

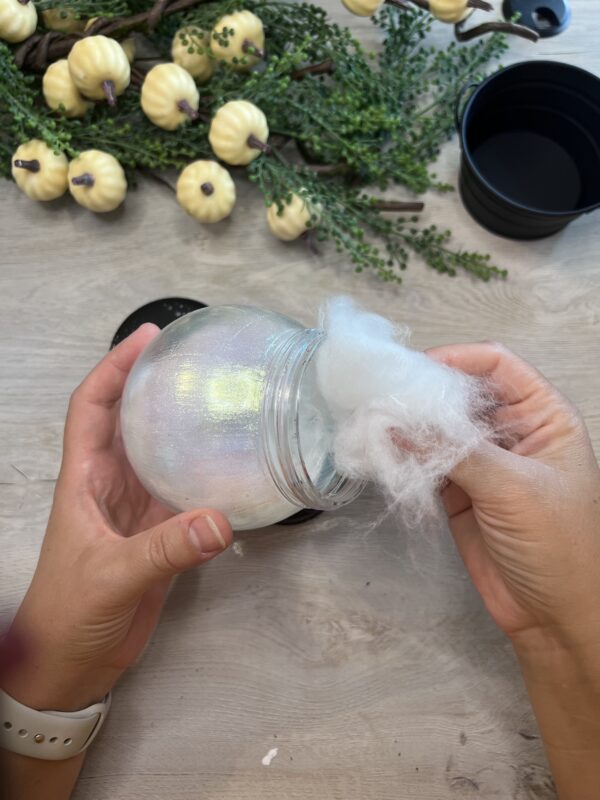
Grab a bit of the fake snow, found here – https://amzn.to/4deRTsN,

then stuff the inside.

  • Note- you do not want to much as the light will not be able to make it through to shine. It will just be a thin layer.

Step 4 – Add the Light

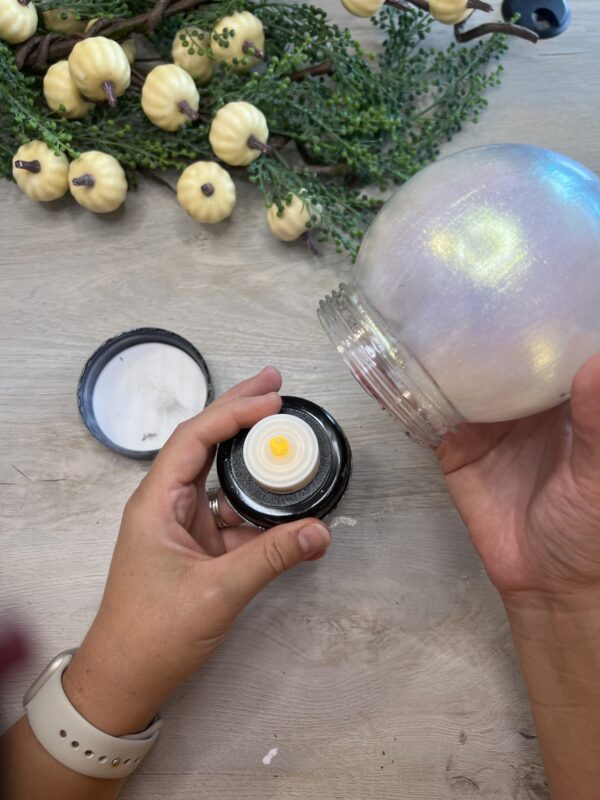
Here i used glue dots to hold ourFlickering Tea Light Candlein place on the insert of the snowglobe. This allows it to be easily removed to turn on and off, but holds it in place.

Step 5 – Assemble the SnowGlobe

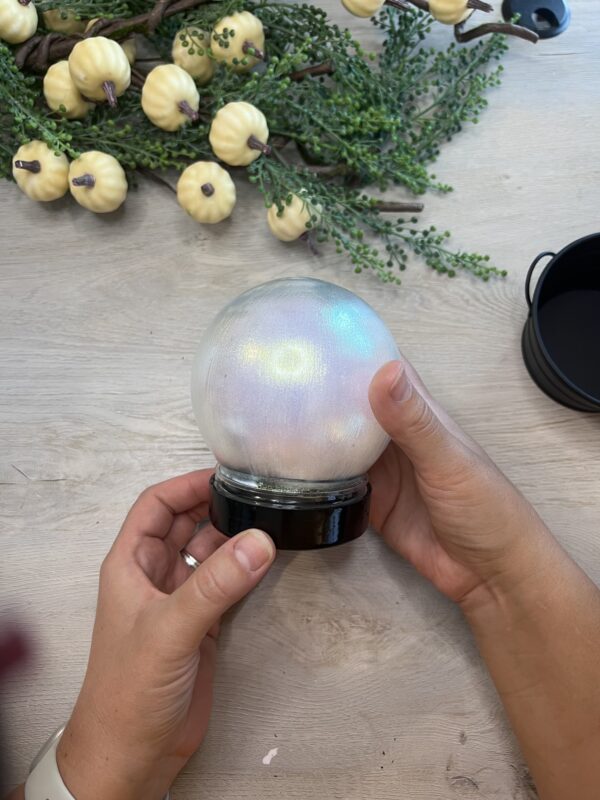
Push the insert with the tealight added on into the globe portion. Then screw the cap back on.

Step 6 – Finished Product

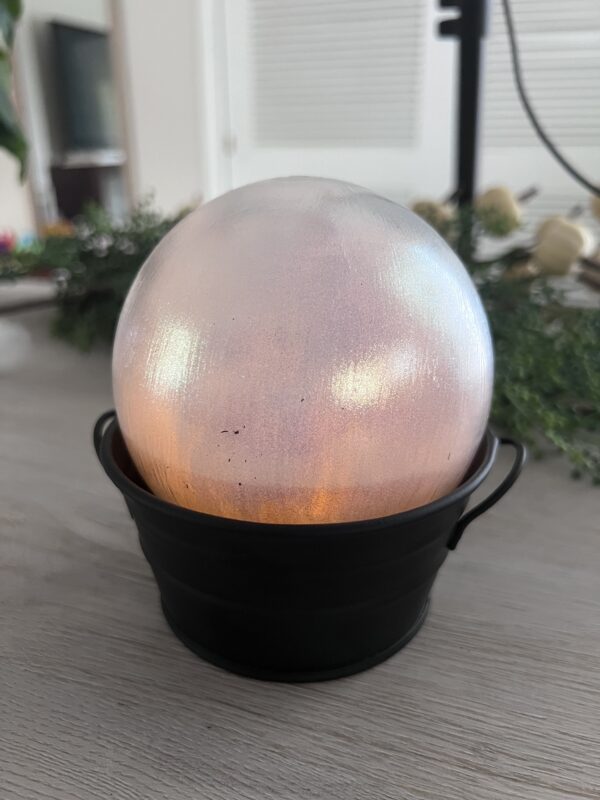
Lastly, place the globe inside the Primitive Black Tin Round Tub. This is the final step and now you can enjoy the glow of your new Halloween Crystal ball!

This DIY Halloween crystal ball is an easy, fun project that can be done in an afternoon and enjoyed for years to come. It’s also a fantastic way to get creative with family or friends as you prepare for the spooky season. Happy crafting!

Continue Reading
Change Your Country
Please select your country, this will change the site to your country's currency:

Cancel