Skip to search Skip to navigation menu Skip to main content Selecting option will reload page

Category: "How to" Videos

Make-your-own Stickers with Washi Tape


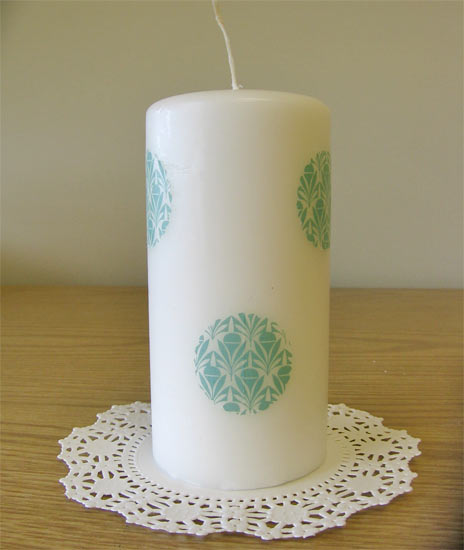
Making your own stickers is super easy with washi tape. I make my own stickers to decorate candles, personalize gift bags, and just for fun. The most important part of making your own stickers with washi tape is making sure that your pattern lines up appropriately. In this demo, I used a paper punch to cut out my sticker design, but I have free-hand drawn designs before as well. Your stickers will look more professional if you choose a symmetrical design, so if you want to do a free-hand design, I would suggest gently folding your tape and wax paper, drawing one half of your design and cutting out both sides. This is a fun project to do with kids as well. If you do not want to worry about matching up the washi tape design, simply choose sticker shapes that are smaller than the width of your washi tape. You can even make stickers and give them to someone as a gift if you leave the wax paper backing. This sticker-making technique is a great and can be used for tons of different sticker uses. I hope you enjoy this tutorial and get creative with your sticker designs!

Difficulty level: Beginner
Time required: 20 minutes
Age range: 12+

Things you’ll need:
Washi tape
Wax paper
Paper punch (or scissors if you are doing a free-hand design)
Candle

Things to do:
1. Cut a strip of washi tape and place on wax paper.
2. Cut another strip of washi tape and line the pattern up to the pattern of your other piece of washi tape on the wax paper.
3. Use your paper punch to cut your sticker design out of the washi tape and wax paper.
4. Peel your Washi tape sticker off of the wax paper backing and place it onto your candle, making sure that the strips line up appropriately.
5. Continue making stickers and decorating your candle until you are satisfied with your design!

Continue Reading

DIY Dashboard Hula Girl


If you have a road trip planned for this summer, why not make a Hula Girl for your car dashboard? Even if you are not going to Hawaii, a little dancing Hula Girl will bring the feeling of summer to your commute. I love the way she bounces back-and-forth! I have given these little dolls as a summer pick-me-up too for anyone who is stuck at work. Either way, this is an awesome craft project and is perfect for celebrating summertime fun!

Difficulty level: Beginner
Time required: 20 minutes
Age range: 8+

Things you’ll need:
Felt squares (cut in a circle about 3-5″ in diameter)
Wooden doll body
Pipe cleaner
Pen or pencil (to wrap your pipe cleaner around)
Hot glue gun and glue stick
Tape
Scissors
Paint or markers to decorate your wooden peg

Things to do:
1. Use paint or markers to decorate your wooden peg to look like a hula girl’s head and torso. Let dry.
2. Use your scissors to cut a line in your felt circle that starts at the edge of your circle and ends roughly in the center of your felt circle.
3. To make your hula skirt, fold your felt circle over itself where you cut a line. This should result in a felt cone shape.
4. Use the hot glue gun to glue your felt cone into place.
5. Cut a small circle at the point if your skirt and slip your wooden peg figure through it.
6. Glue your felt skirt onto your wooden peg doll to secure into place.
7. Use your scissors to cut strips into your skirt to make it look like grass.
8. Wrap your pipe cleaner around a pen and slide off to create a spring.
9. Glue one end of your spring to the bottom of your wooden peg doll.
10. Tape the other end of your spring to your car’s dashboard or a table and watch your hula girl dance and sway!

Continue Reading
Change Your Country
Please select your country, this will change the site to your country's currency:

Cancel