Skip to search Skip to navigation menu Skip to main content Selecting option will reload page

Category: General Crafts

Ribbons and Bows: Ponytail Streamer

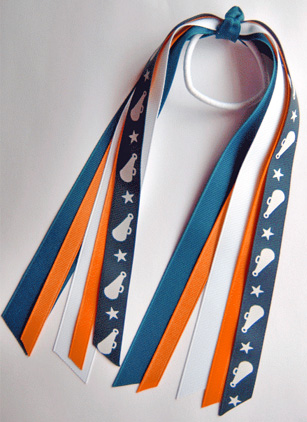
Ponytail-StreamerWhether you’re looking for the perfect finishing touch for a special occasion outfit, showing your team spirit for the big game, or just want to add a little bling to summer ponytails and up-do’s, these crafty hair accessories are just the thing for dressing up your tresses in style.

Things you need:
Ribbon
Scissors
Crafters Pick Fabric Glue
Hot Glue Gun and Glue Sticks
Elastic Ponytail Holder (that matches your hair color)
Needle and Thread

Things to do:
1. Snip 8-10″ lengths of ribbon; for added interest, mix and match widths, textures, and tones.
2. Next, align your ribbons and add a dab of glue to their midpoints then slightly overlap the ribbons. Do not stack the ribbons on top of each other. Set aside and let dry.
3. Weave your needle and thread through each ribbon and all the layers. Do this about three times and tie the thread off.
4. Hot glue your ribbon bundle to your ponytail holder and let cool.
5. Finally, cut a 2-1/2″ piece of ribbon and tie it in a loose knot. Hot glue the knot on top of the ribbon bundle and glue the ends under the ribbon bundle. Let cool and now your ponytail streamer is finished!

Tip: To prevent fraying, cut ribbon ends at an angle, or in an inverted V.” For added fray protection, coat the cut edges with a thin layer of clear fingernail polish, Fray Check, or clear drying glue. If your ribbon is delicate, test these methods on a sample piece before starting your project.
Continue Reading

Upcycling: DIY Wine Bottle Accent Light

wine_bottles
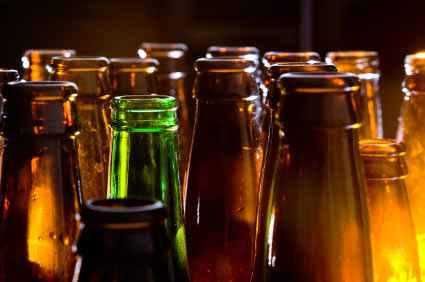
You had a great time emptying those wine bottles, why not put them to good use? This illuminating craft is as much fun to make as it is eco-friendly, and will cast a warm glow in any room in your home.

Things you need:
Empty wine bottle (light green Chardonnay bottles and blue Riesling bottles work best)
1/2″ ceramic tile drill bit
Eye protection
Old towel
Drill
Masking tape
20-count teeny Christmas light set

Things to do:
1. Rinse and dry your bottle. You can removed the labels if you wish. Place a small strip of masking tape on the back of the bottle, about 3 inches up from the base.
2. Lay bottle on towel and position tape side up; use the towel edges to hold on to the bottle.
3. Slip on your safety goggles, hold onto the bottle through the towel, and begin drilling using moderate pressure. (Tip: This is a SLOW process. Take your time and don’t try to rush; otherwise, the bottle may break.)
4. Rinse bottle to remove any glass dust, and allow to thoroughly dry.
5. When completely dry, slowly begin threading the lights into the bottle.
6. Plug in and enjoy the lightshow!

Project Notes:
Keep in mind that your wine bottle accent light will become warm to the touch, so be sure to display atop a trivet to protect wood furnishings. Also, while the ceramic tile drill bit (around $15) is on the pricey side, it will have enough oomph” to complete 6-8 accent lights.

Wine bottle accent lights add a warm glow to master suites, patios, and studies, and are a fitting finishing touch to any vineyard-themed decor. Enjoy these illuminating adornments in your own home, or present them as a fun and unique gift to the wine aficionado in your life.

Continue Reading
Change Your Country
Please select your country, this will change the site to your country's currency:

Cancel