Skip to search Skip to navigation menu Skip to main content Selecting option will reload page

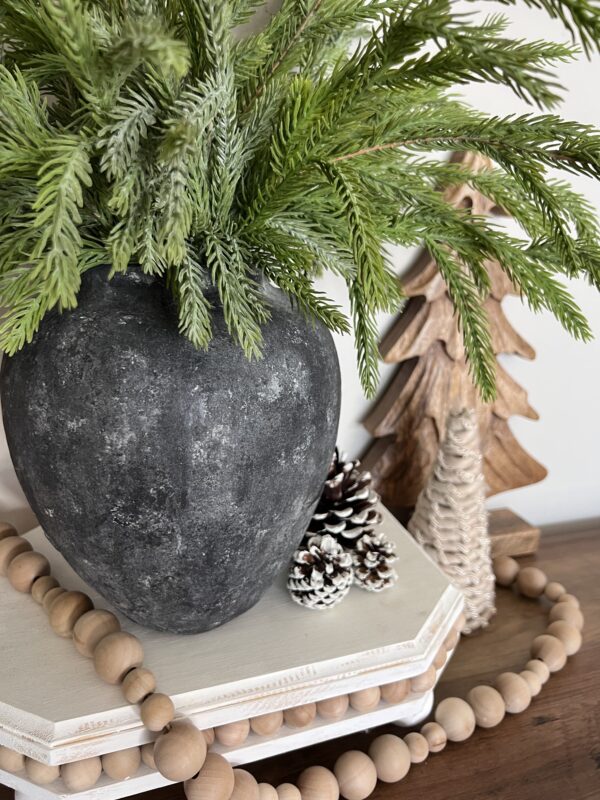
DIY Stone-Look Paper Mache Vase: Pottery Barn Inspired

Are you looking to add a touch of rustic elegance to your home decor without spending a fortune? Transforming a plain paper mache vase into a faux stone masterpiece is an easy and affordable project. With just a few supplies and some creativity, you can create a stunning decor piece that looks like it belongs in a high-end store. Here’s a step-by-step guide to achieving a faux stone look using paint and baking soda.

Materials Needed:
Paper Mache Vase
FolkArt Medium Gray Acrylic Paint
Black Apple Barrel Acrylic Paint
Titan Buff DecoArt Americana Premium Acrylic Paint
Artificial Spruce Bundle of Soft Wispy Norfolk Pine Sprigs
Baking Soda/Flour
Paint brush
Sponge

Find all materials here:
https://factorydirectcraft.pro/catalog/advanced_search_result.php?keywords=FBfxstnVSpprmch
Compressed Round Sponge here:
https://amzn.to/3CeRWaI
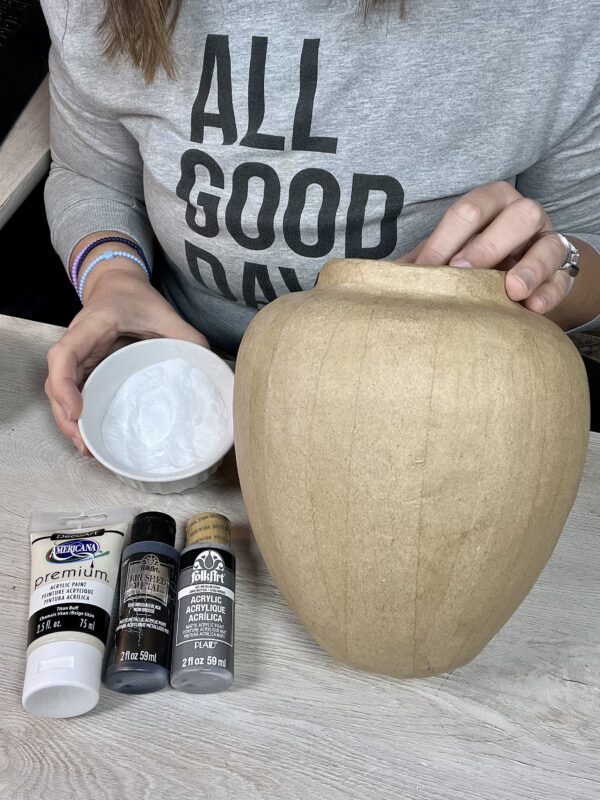
Let’s grab your supplies, channel your inner artist, and let’s get crafting!
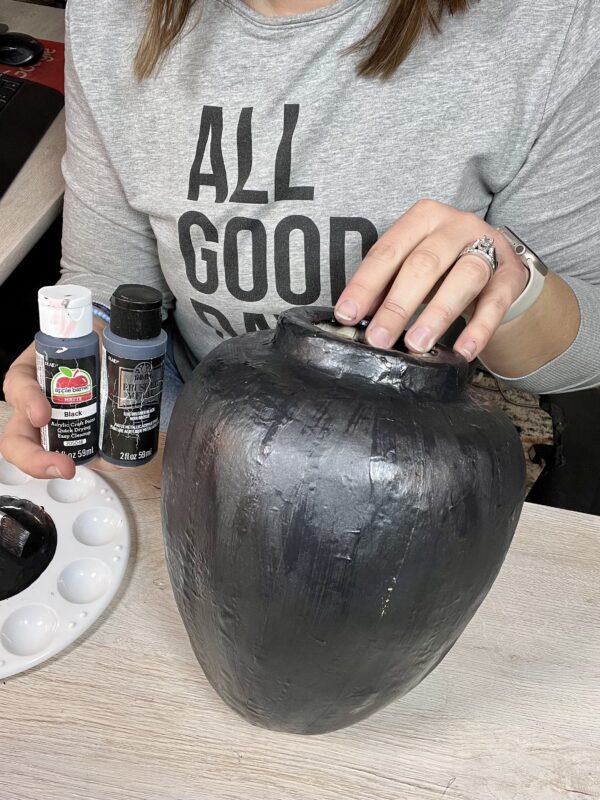
Step 1: Apply the First Coat
Using a large paintbrush, apply the main base color to the vase. Cover the entire surface and let the first coat dry completely before moving on. Here i chose to use a black for my base color.
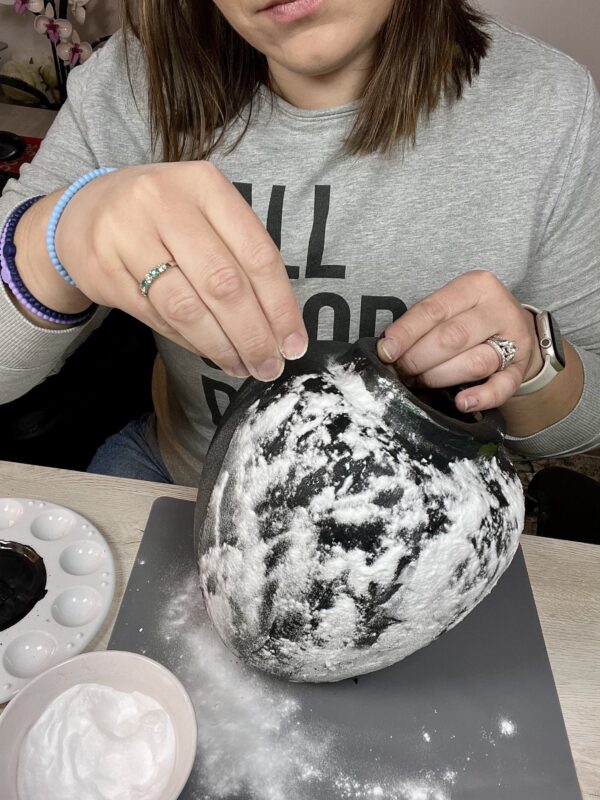
Step 2: Enhance the Texture

You will then Paint a 2nd coat of the base color. You can go in sections or paint it all at once. Once all the vase is covered with the wet paint, sprinkle your desired amount of baking soda over the vase. You will let it sit on the vase as the paint drys.
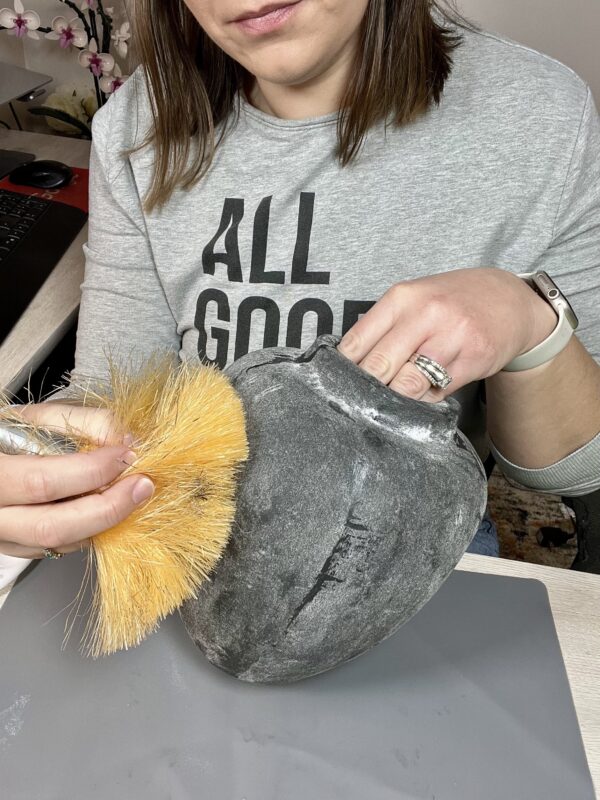
Step 3: Brush off the Extra

Once the baking soda has sat on the vase for a few minutes to dry. You will grab a duster or a paper towel to brush off the extra baking soda.
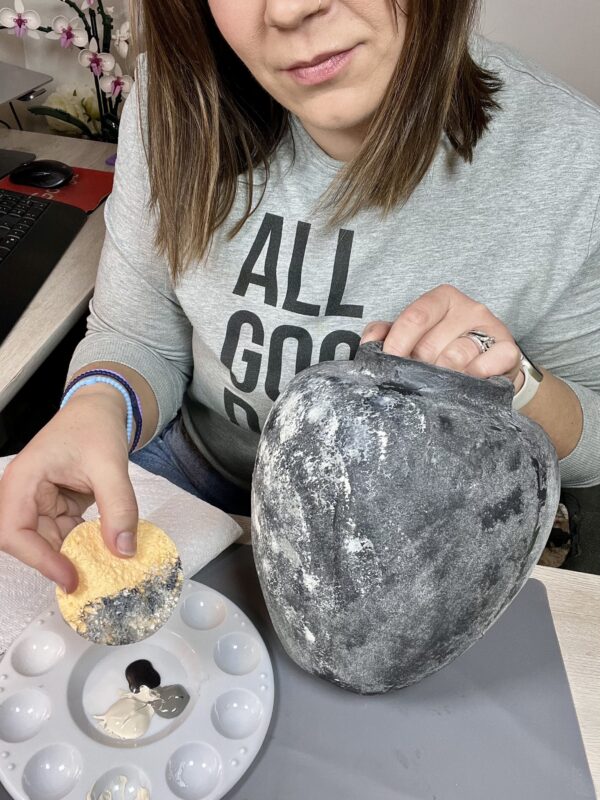
Step 4: Add Depth with Additional Colors

Here i used a compressed circle sponge, these things come in handy for many things! They are a must to keep around!

Grab one of the sponges and get it wet to “fluff” up. Squeeze out the extra water and dip into your additional colors to add the texture and depth. I chose to use the Black Apple Barrel Acrylic PaintMedium Gray Acrylic Paint, and Titan Buff DecoArt paint.
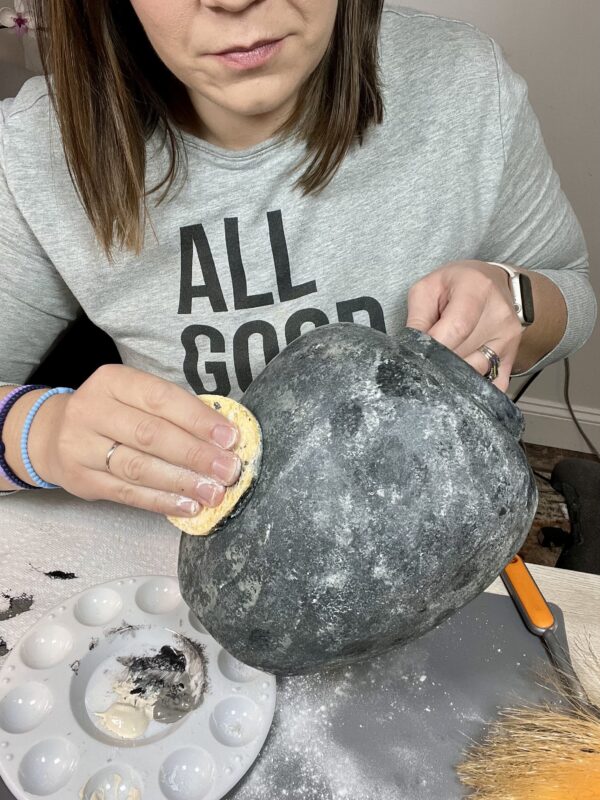
You will dap a bit of each color on the sponge and use a dapping motion to add the color across the whole vase. While that paint is still wet, you will add a bit of baking soda to that as well.
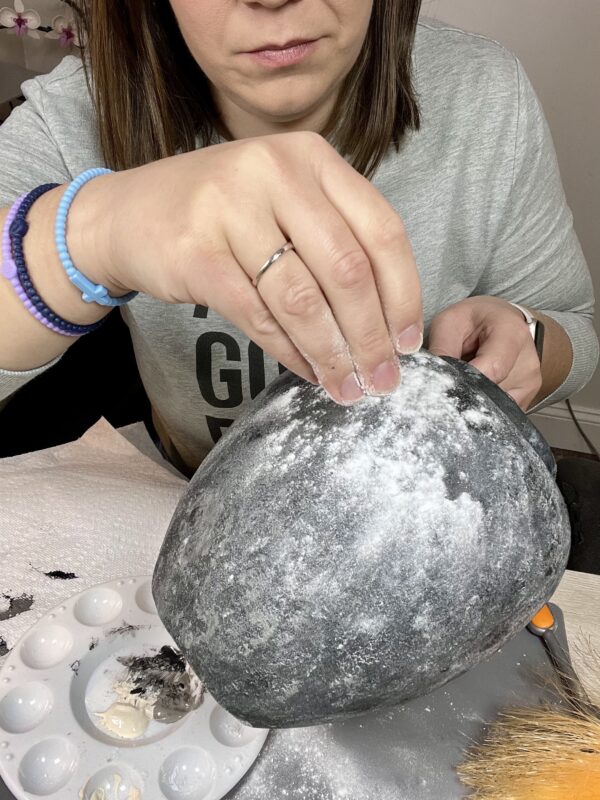
Let the baking soda sit on the vase while paint drys and brush off again. Here you may need to repeat the dabbing motion with the choice of paint many times until you get your desired look.
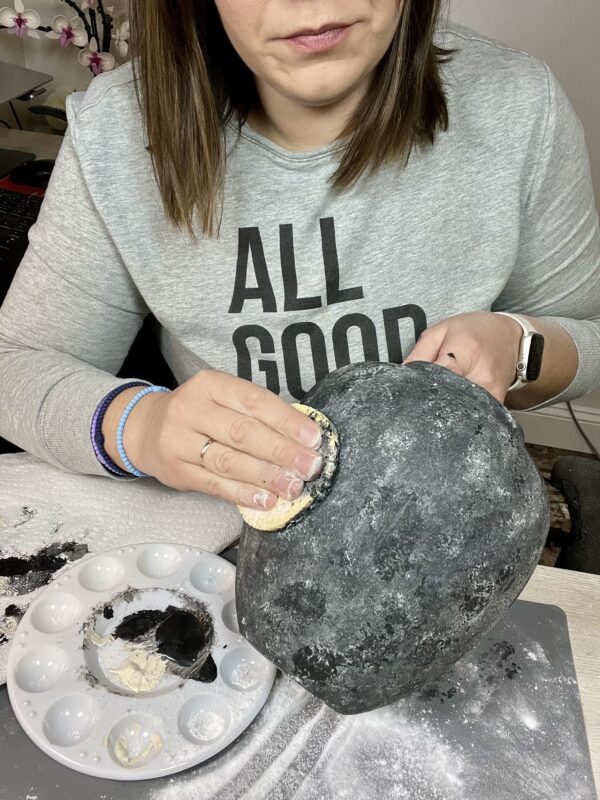
Once all was set, i can black with just the black paint and did the dabbing motion over all of the vase. This helps blend everything together and help cover up areas that might be to light in color.

Don’t be afraid. Just grab paint and dab. You can always come back and add more color if needed to help cover up any areas you are not loving. Sprinkle with baking soda one more time and brush off!
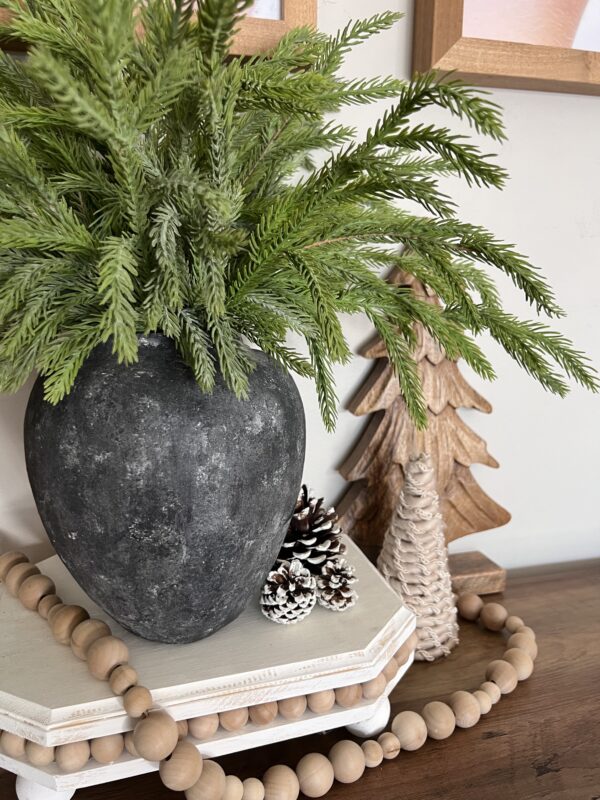
Styling Your Faux Stone Vase

Your DIY faux stone vase is now complete! Style it with dried flowers, pampas grass, or minimalist greenery to complement its natural aesthetic. Place it on a shelf, mantel, or dining table for a timeless decor accent.

This project is perfect for DIY enthusiasts who love adding personal touches to their home decor. With its earthy, sophisticated vibe, your faux stone vase will surely be a conversation starter and not BREAK the bank. Happy crafting!
Continue Reading

DIY Valentine’s Day Wreath: Ombre Wooden Hearts on a Grapevine Base

Valentine’s Day is the perfect time to add a touch of love to your home decor, and what better way to do it than with a handmade wreath? This project combines the rustic charm of a grapevine wreath with the soft, romantic look of ombre-painted wooden hearts. It’s simple, fun, and a wonderful way to add a personal touch to your Valentine’s Day decorations. Let’s dive into the steps to create your very own DIY Valentine’s wreath.

Difficulty level: Beginner
Time required: 25 Mins
Age range: 8+

Materials Needed:
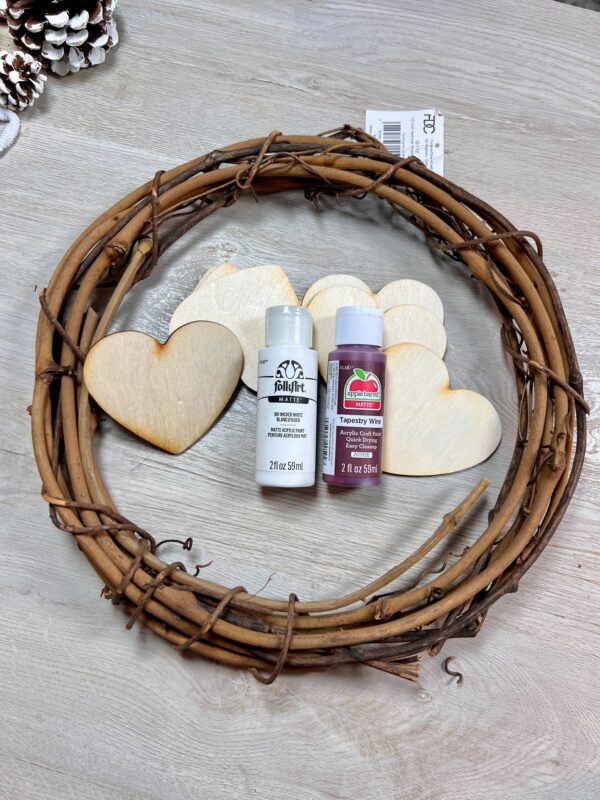
12″ Natural Grapevine Wreath
1″ Ivory and Cream Striped Linen Ribbon
10 ofUnfinished Wood Heart Cutout
FolkArt Wicker White Acrylic Paint
5/8 wide White Double Face Satin Ribbon
Paintbrush
Hot Glue Gun
Scissors / Wire Cutters

Find all materials here:
https://factorydirectcraft.pro/catalog/advanced_search_result.php?keywords=FBvlntnwrthgrpvn

5/8 wide White Double Face Satin Ribbon here:
https://amzn.to/40dIlJp

Let’s grab your supplies, channel your inner artist, and let’s get crafting!

Step 1: Paint the Ombre Effect

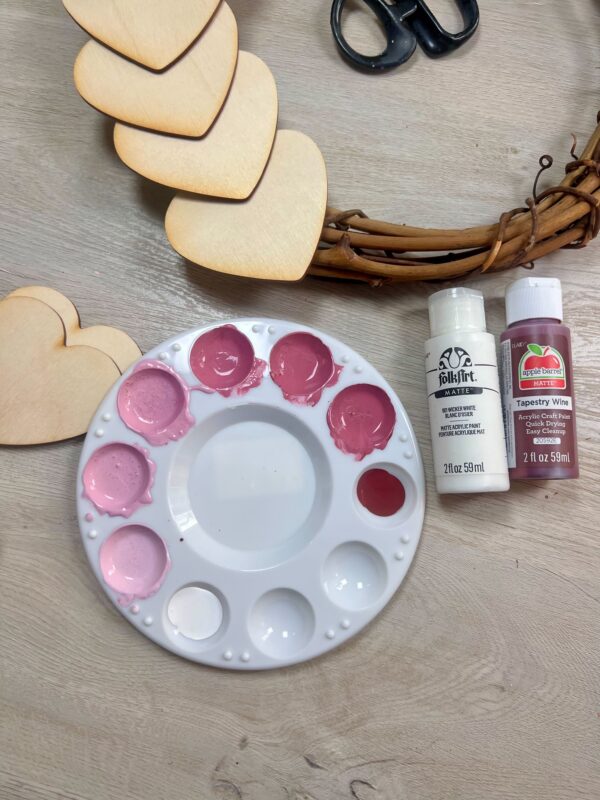
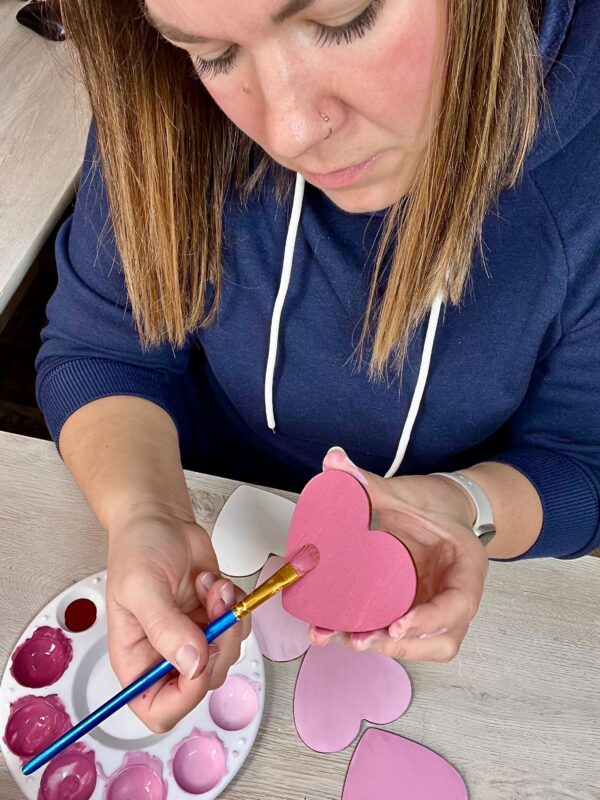
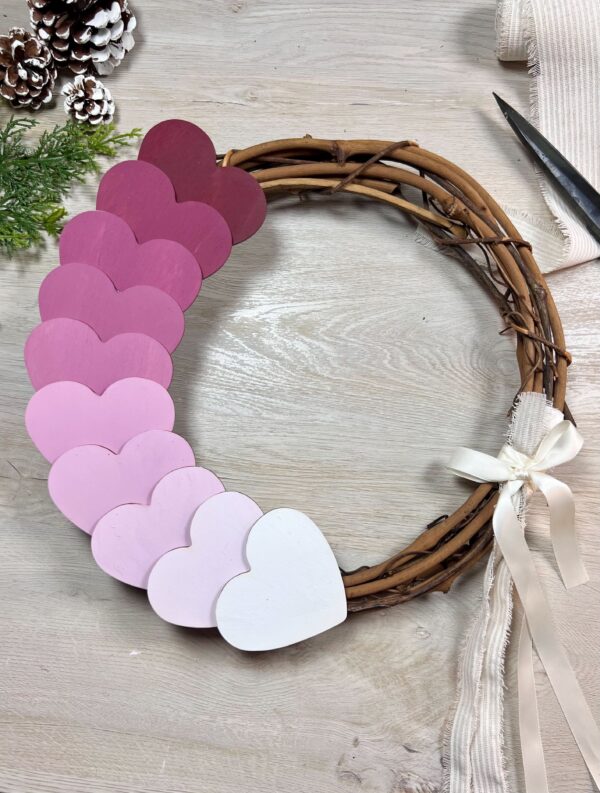
Choose your paint colors and create an ombre gradient. For a classic Valentine’s look, use shades of pink transitioning from light to dark. Here i chose our Tapestry Wine Apple Barrel Acrylic Paint and a simple white paint, FolkArt Wicker White Acrylic Paint.

To achieve the ombre effect:

  1. Start by adding five portions of white paint and five portions of wine-colored paint to your palette.
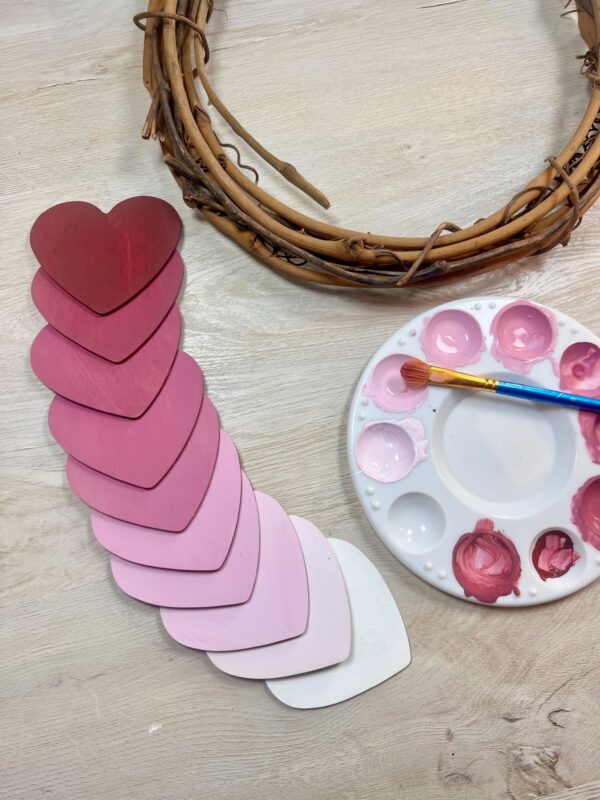
  2. Begin with the white paint. Leave one portion plain white, and for the remaining four portions, gradually mix in the wine color: add one drop of wine paint to the first, two drops to the second, three drops to the third, and so on. This creates a seamless transition from white to a light wine shade.
  3. Next, take the wine-colored paint and reverse the process. Start with one portion of pure wine paint, then gradually mix in drops of white paint to the remaining four portions to lighten each one progressively.
  4. Allow all the hearts to dry completely.

Step 2: Arrange the Hearts on the Wreath

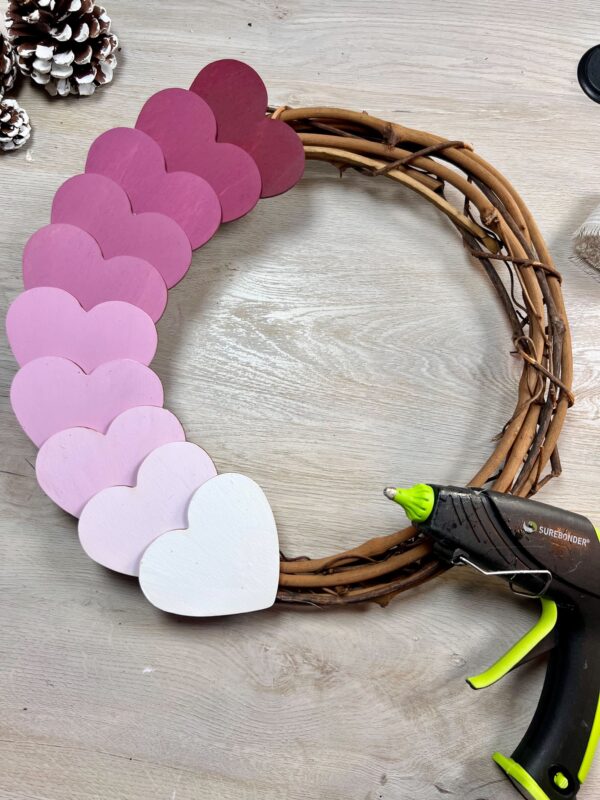
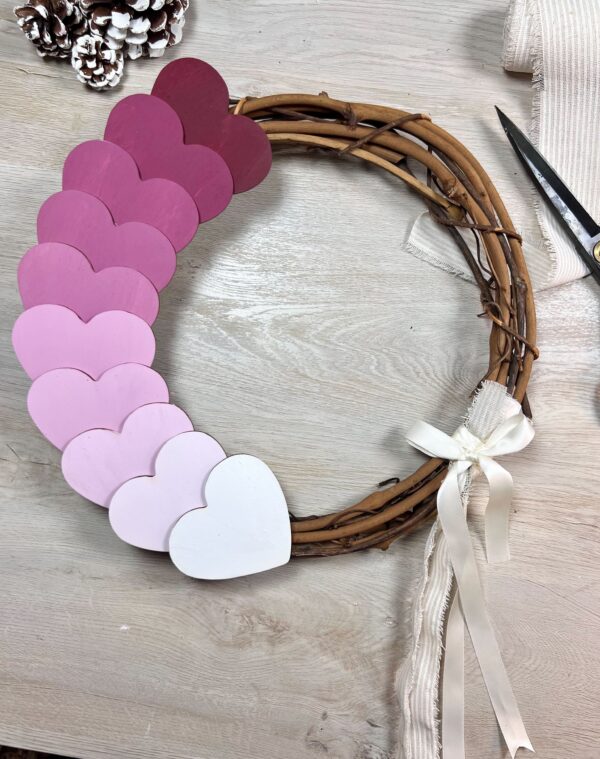
Once your hearts are dry, arrange them on your grapevine wreath. Play around with different placements until you’re happy with the layout. You can cluster the hearts on one side for an asymmetrical look, scatter them evenly around the wreath, or create a pattern like alternating colors.

Use a hot glue gun to securely attach the wooden hearts to the grapevine wreath. Press each heart firmly into place, holding it for a few seconds to ensure it sticks well. Be careful with the hot glue, as it can seep through the gaps in the grapevine.

Step 3: Add Finishing Touches
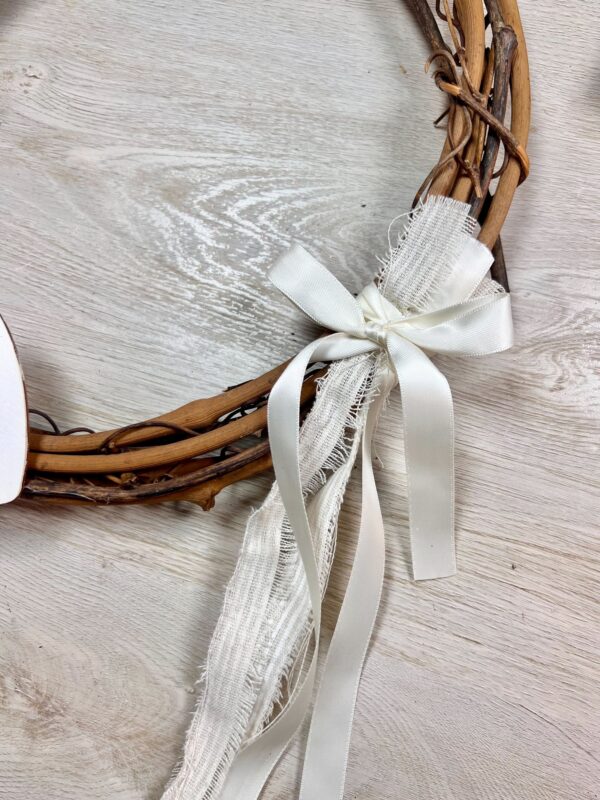
Adding a bow made from ribbon on the opposite side of the wreath. Here I grab our 1″ Ivory and Cream Striped Linen Ribbon.

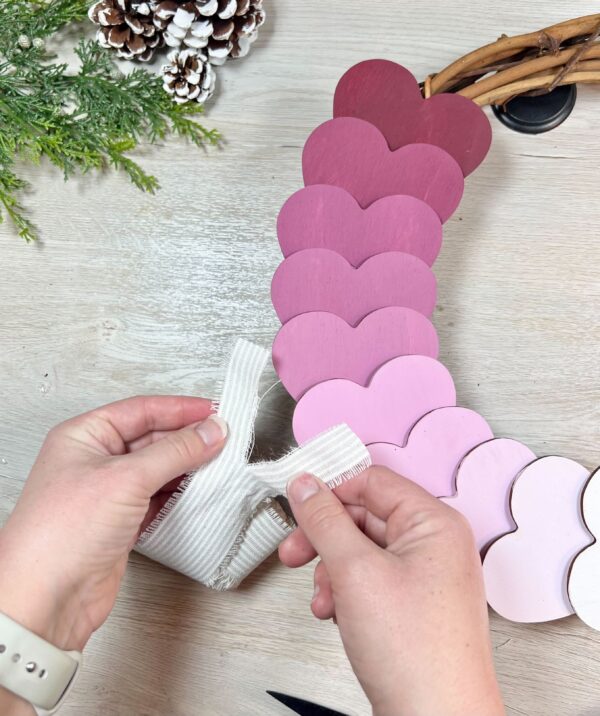
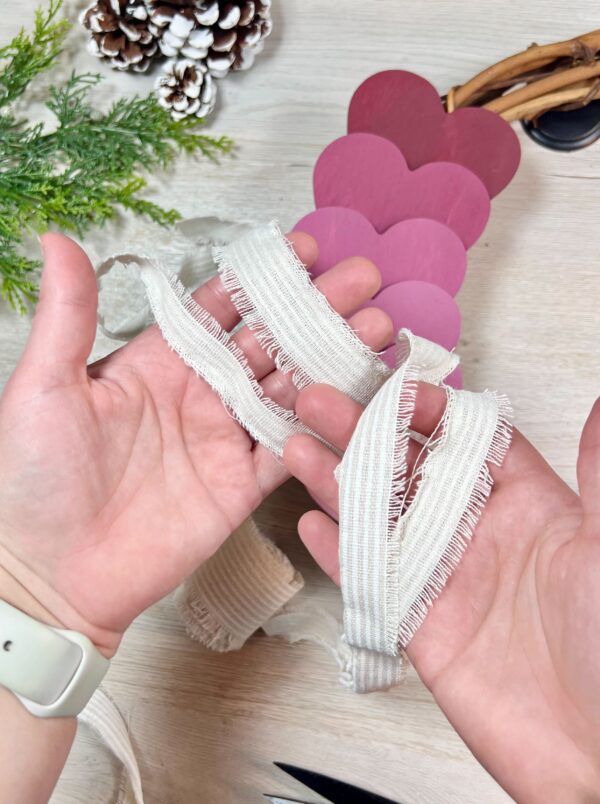
Cut the ribbon approximately 15 inches long. Next, make a small slit in the middle of the ribbon and tear it carefully to create two separate 1/2-inch strips. Place these two strips on opposite sides near the bottom of the wreath.

For layering, take the 5/8-inch White Double Face Satin ribbon and cut a longer piece of this ribbon and wrap it around the two linen strips already laid on the wreath. Then, bring the ends of the ribbon to the front and tie them into a neat bow to finish the look.

Step 4: Hang Your Wreath

Attach a loop of ribbon or twine to the back of the wreath for hanging.

Your DIY Valentine’s Day wreath is now ready to display! Hang it on your front door, above a mantel, or anywhere in your home to spread a little love and cheer. Not only is this wreath a beautiful decoration, but it’s also a heartfelt creation that you can enjoy for years to come

Continue Reading
Change Your Country
Please select your country, this will change the site to your country's currency:

Cancel