
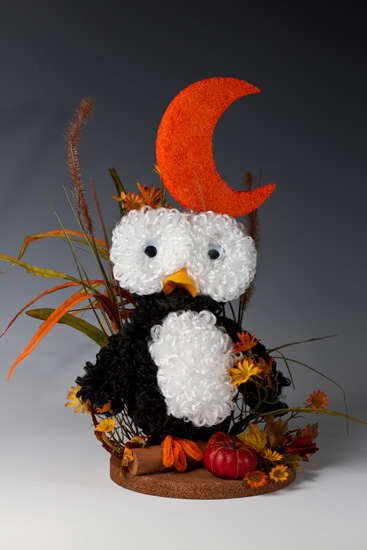
Things you need:
1 Hank – Black Jumbo Loopy Chenille
1 Hank – White Jumbo Loopy Chenille
1 – 3″ Styrofoam Ball
1 – 6″ Styrofoam Disc
1 – 8″ Round Styrofoam Disk
1 – 4-3/4″ Styrofoam Egg
1 – 5/16″ Dowel Rod
1 – 1-1/8″ Dowel Rod
2 – Orange Pipe Cleaners
2 – Unfinished Wood Jumbo Popsicle Sticks
2 – 40mm Googly Eyes
1 – Tangerine Orange Felt Square
1 – Autumn Daisy Rattail Bush
Assorted Decorative Fall Pumpkins
Floral U Pins
Nutmeg Brown Apple Barrel Acrylic Paint
Harvest Orange Apple Barrel Acrylic Paint
Things to do:
1. Using the Moon Template, cut out a crescent moon shape from your 6″ styrofoam disc. Paint the moon with the Harvest Orange Apple Barrel Acrylic Paint and set aside to let dry.
2. Carefully cut the 3″ styrofoam ball in half. Then glue the remaining part of styrofoam from the disc onto the flat section of the styrofoam ball. Set aside and let dry. This will be your owl’s head.
3. Glue and pin black loopy chenille completely around the owl’s head.
4. Holding your styrofoam egg upright, wrap the black loopy chenille vertically around the egg, leaving a small section uncovered on one side. Cut 3″ strips from the white loopy chenille and glue to the section that you left uncovered, this will be your owl’s body.
5. Cut two – 12″ strips from the white loopy chenille and coil each strip in a flat circle. These will be your owl’s eyes. Glue them to the front of your owl’s face.
6. Cut two – 18″ strips from your black loopy chenille, then fold the strips into a loop and a half. Then pin to the sides of your owl’s body.
7. Cut your 1-1/8″ dowel rod in half and paint it with the Nutmeg Brown Apple Barrel Acrylic Paint. Set aside and let dry.
8. Paint the 8″ styrofoam disc with the Nutmeg Brown Apple Barrel Acrylic Paint and set aside to dry.
9. Using two orange pipe cleaners, form four loops on each pipe cleaner. These will be your owl’s feet. Place three of the loops in the front and a loop in the back. Bend the feet around the dowel rod “log” and glue in place.
10. Using a wooden jumbo popsicle stick to connect the head to the body. Take another one of the jumbo popsicle sticks and stick it in the bottom of your owl’s body and have it sticking out at bottom some. Place the remaining half of the popsicle stick into the styrofoam disc base. Glue both ends and glue the stick against the log to secure it.
10. Cut a small triangle from the orange felt, making a beak for the owl. Glue the beak to the face where the eyes meet at the bottom. Glue the eyes onto the face. Take the autumn daisy rattail bush and glue in to back behind the owl. You may cut apart and glue pieces all around the owl however you desire to places the accessories. You may also fill in with odds and ends on hand, such as small pumpkins and small leaves to place around the owl.
