Skip to search Skip to navigation menu Skip to main content Selecting option will reload page

Category: General Crafts

Paper Flower Card

paper_flower_card
Between weddings, parties and weekend getaways, summer is jam packed with occasions for simple, beautiful cards. Give the bride and groom your best wishes, thank your hostess for the perfect relaxing weekend, or send a cheerful thank you to party guests with this elegant and deceptively easy card. Crafted from a single sheet of good quality cardstock, you can create endless variations on this card to suit any occasion.

Things you need:
1 8-1/2″ x 11″ sheet of good quality white cardstock
Ruler
Craft Knife
Scissors
Bone Folder
Drinking glasses of various sizes
Pencil
Incredibly Tacky Crafter’s Pick Glue
Small button or rhinestones

Optional:
Scrap of contrasting paper
paper_flower_card2

paper_flower_card3
Things to do:
1. Trim the paper in half using the ruler and knife leaving two pieces of 5-1/2″ x 8-1/2″, reserve one sheet for the card.
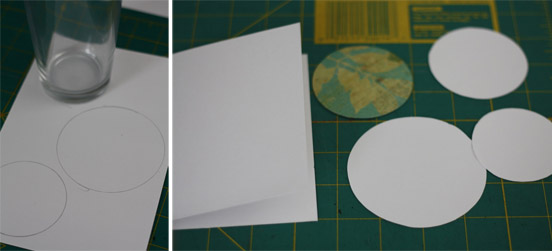
2. Using the top and bottoms of the glasses, trace four circles on the remaining piece of paper ranging from 3-1/2″ in diameter to 2″ in diameter. If you choose, one circle can be cut from the contrasting paper.
3. Start forming the layers of the flower. Cut in towards the center of the smallest circle at 1/4″ intervals, being careful not to cut all the way through. Round the edges of each petal then, using a bone folder, press a crease down the center of each to give the flower more texture and depth.
4. Continue with the remaining circles, cutting larger petals with each and varying the shape of the petals from flower to flower.
5. Fold the reserved piece of paper neatly in half to create the card. Arrange the layered flowers just to the left and top of the center of the card. Glue the bottom layer in place and then glue each layer, centering it on the bottom layer. Top with the button or rhinestone and add your personal message to the recipient.
Continue Reading

Fun with Mod Podge: Create a unique glass candle holder

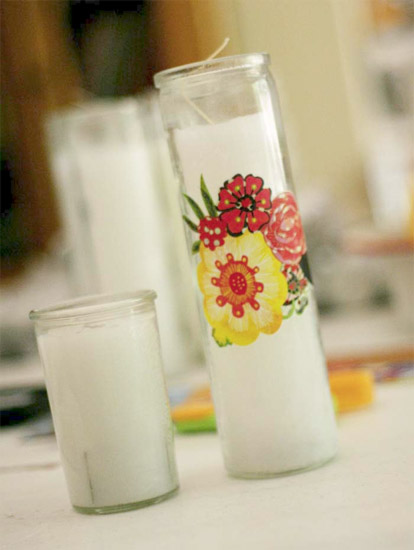
mod_podge_candle_holder
If you’re going through a low cash-flow period but need a quick gift idea, add a little light to the topic with this quick and easy project.

Things you need:
Glass Candle Holder
Pictures or other images
Mod Podge
Sealant

Things to do:
1. Wash the glass surface thoroughly with soapy water, then wipe with vinegar and set aside to dry. After you have cleaned it, try not to touch the outer surface of the candle so oils from your fingers do not adhere to the glass.
2. Pull out some scraps of old crafting paper you’ve saved, and/or a pile of old magazines. Look through the magazines to find some images that inspire you and cut these out. You can also use some photos you’ve scanned into your computer and printed out.
3. Measure the candle holder length and circumference to determine the dimensions, then set your images and pieces of parchment paper on a table and experiment with different layouts. Since this will be for a candle holder, you may want to think about leaving blank spaces between images and cutting images in different shapes to create an interesting effect when the candle is lit.
4. Once you have decided how you want to arrange the images, you will glue them to the glass surface. Apply Mod Podge to the back of your images carefully press the image down flat to avoid any bubbles or ripples.
5. Allow the glue to dry completely, and then remove any traces of glue from the glass using a window cleaning product or vinegar using a sponge or cotton swab.
6. Let dry again after cleaning glue from surface. Then apply water-based varnish. Do not use a flammable sealant since this is a candle!

You can adapt this project for different needs, occasions and interests. For instance, one friend of mine used this idea to create a memory candle with photos for her sister who was grieving a beloved pet. Another friend made an abundance-attracting candle, using a photocopied $50 bill and images of the things she wanted to do with the wealth she desired. My neighbor made a candle for her daughter, who loves fantasy novels and unicorns, using a drawing of a unicorn from an old, partially damaged picture book she found at a yard sale.

Photo credit: Kenner Road

Continue Reading
Change Your Country
Please select your country, this will change the site to your country's currency:

Cancel